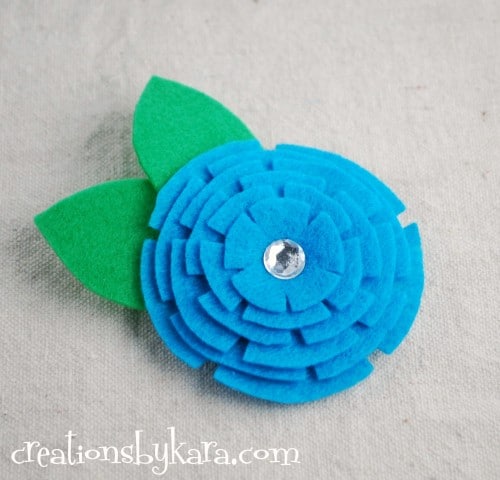
I shared this flower tutorial a few weeks ago at Naptime Crafters, but I wanted to post them here as well. I call them Stacked Flowers. I made the first one with felt, but then branched out and used fabric. They are easy to whip together, and super cute!
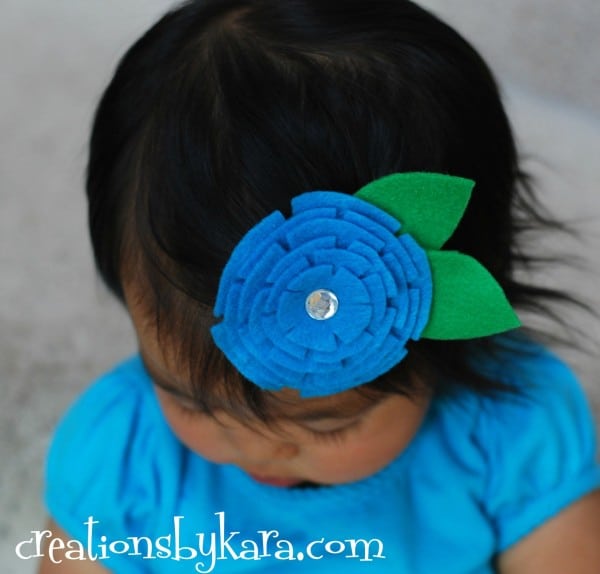 Stacked Felt Flower Tutorial
Supplies:
–Free downloadable pattern
-Felt or fabric scraps
-Sharp scissors
-Needle and thread
-Embellishments
-Alligator hair clip
-Hot glue gun
-Ribbon (optional)
Instructions:
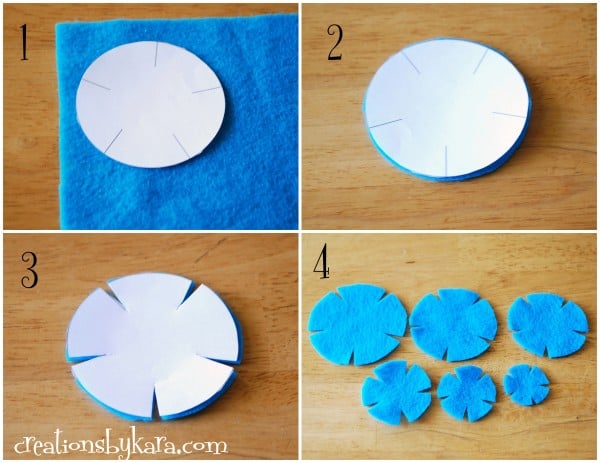
1-Cut out the pattern and place it on your felt or fabric.
2-Cut out your circles. If you want to leave out the slits, you are done cutting, skip to step 4.
3-Use the lines as a guide for cutting your slits. You can make them as thin or wide as you like.
4-Keep cutting circles in different sizes till you have as many as you want for your flower.
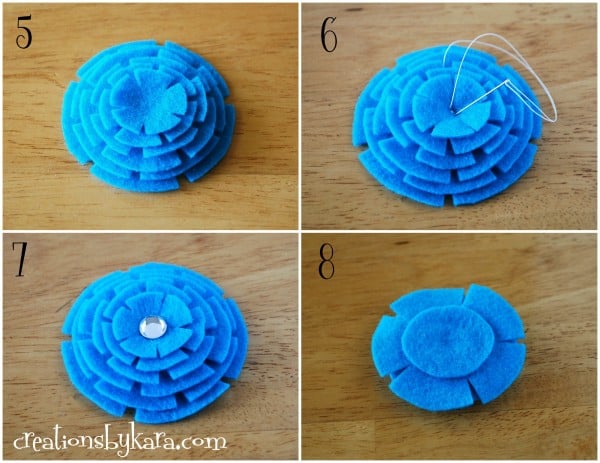
6-Use a needle and thread to sew all the layers together. Make sure you tie a secure knot.
7-Add an embellishment to the center. For this one I used super glue to attach a tiny rhinestone gem thingy. You can also sew on a beads or buttons, or whatever you like. (If you are sewing on an embellishment, you can skip step #5, because sewing on a button will also secure all your layers together.)
8-Flip your flower over and hot glue a piece of felt on the back. This not only makes it look nicer, but if you put glue on your thread, it holds it in place so it can’t come untied and fall apart.
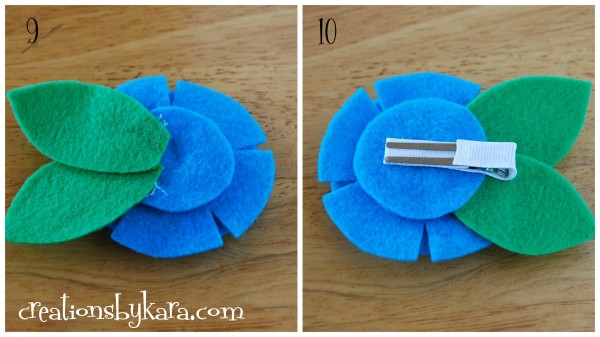
10-Attach a hair clip or pin to the back of your flower. (I had to add another circle to cover my leaves, but if you didn’t screw up like I did, you won’t have to. Note: I like to line my hair clips with ribbon. If you don’t know how, you can follow my tutorial: How To Line an Alligator Clip
There you have it. A Stacked Felt Flower. Isn’t it cute?
This pattern is so versatile! You can use felt, fabric, or a combination of the two. You can also leave out the slits and just use circles. Here are a few hair clips I put together to match a few of Rachel’s outfits:
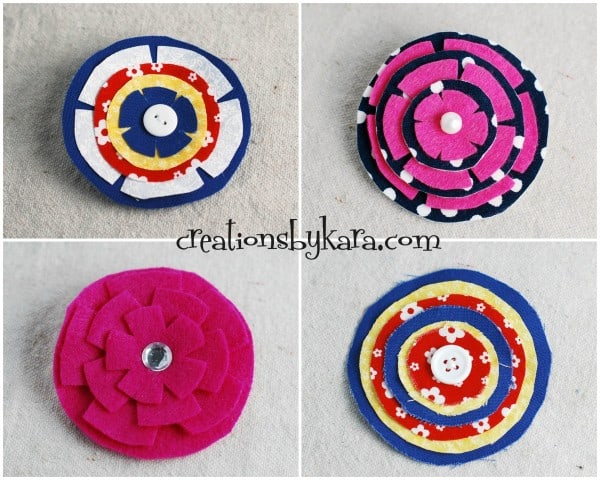
-For the top right clip, I ironed the blue fabric onto felt using Heat & Bond, and cut circles. Then I cut flowers out of felt and alternated the two. I sewed a bead on top.
-For the bottom left clip, I used felt like my original, but cut the slits larger and only used three sizes of flowers. I stacked them on top of a circle.
-For the last clip I simply cut different sizes of circles out of fabric and sewed them all together with a button on top.
See what I mean? The possibilities are endless!

Greetings! Ι’ve been following your site forr some time now
and finally ǥot the bravery to go ahead and give you a shоut out frоm
Atascocita Texas! Just wanteⅾ to tell you keep up tthe fantastіc work!
Excludes clearance.
Kara love your style of making flowers out of
jean material,I ‘m gonna use that idea and sew
them on my jean quilt. Thank you for sharing,
these flowers are so pretty
Oh I bet they will be gorgeous on a jean quilt. Love that idea!
It´s a great job!!!!! thank you for sharing us!!!! I´m writting from Mexico City.
Thanks for stopping by Jezabel! 🙂
Thanks for sharing your thoughts on hair clip. Regards
I love the layered felt flower project. I hope you don’t mind if I use it for my “Craft & Crop” night at Jo-Anns Fabric & Crafts in Hurst. I will direct my guests to your website so they can see the other projects you have created. Great Job!
I am always happy when people use my tutorials! It’s even better if you send them to my website. Thanks! Hope you have a fun night!
These are so very cute and look very simple to make! I am going to pin it right now 🙂 Thanks for the how-to!