Glitter Star Christmas Ornament Tutorial – these simple white star ornaments will look great on any Christmas tree. They are easy to make, and so pretty!

My mom has a tradition of giving each of the grandkids a Christmas ornament each year. I’m in the process of switching over to a farmhouse style tree, and when I saw the stars she gave my kids last year, I knew they would be a perfect fit!
She came over and helped me make them, and we were able to crank out two dozen of them in an afternoon. The only thing that takes awhile is waiting for the paint to dry!
I used mine on my red and white farmhouse tree, but they are neutral enough that you can use them to match any decor. You could even paint them different colors if you prefer.
HOW TO MAKE GLITTER STARS
Supplies needed (includes affiliate links):
- 3-D paper mache stars ((mine are 3 1/2″ and came with silver string attached)
- White paint (I used chalk paint, but craft or latex paint will also work)
- Paintbrush
- Craft glue
- Glitter
- Tidy Tray for catching glitter (optional, but VERY handy)
STAR ORNAMENT INSTRUCTIONS:
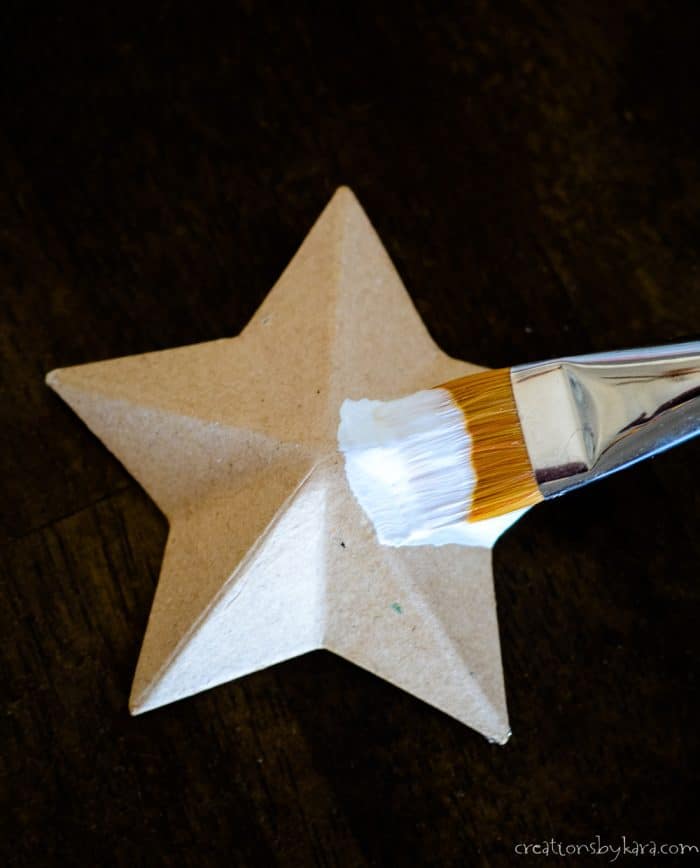
Paint both sides of the stars. I like to paint the front, let them dry, then flip them over and paint the backs.
Let dry completely. The paper mache soaks up the paint, so they actually dry pretty quickly.
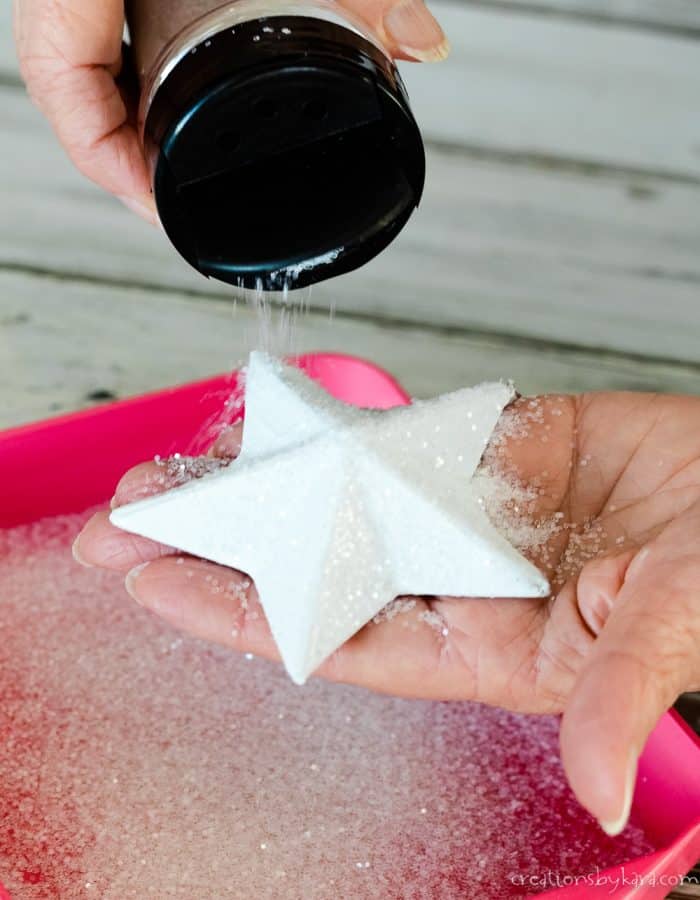
Brush a liberal layer of craft glue on the back of the stars. Quickly sprinkle glitter over the glue, allowing the excess to fall into the tray. I highly recommend using the tidy tray. The funnel at the end makes it SO much easier to get the extra glitter back into the jar. But you can use a bowl if you don’t have one.
Tap the edge of the star lightly to remove loose glitter. Repeat the process on the front of the stars. Let glue dry completely.
After the glue dries, check the front of the stars to see if there are any spaces missing glitter. If there are, use a small brush to apply glue to the area, then add more glitter. Let dry.
Since I used a thick layer of glue, I let my stars dry overnight.
Now hang them on the tree, stand back, and admire your work! The photo doesn’t quite capture the shimmer that they give off. When the tree lights shine on them, they reflect the light so beautifully!
STAR ORNAMENT VARIATIONS:
-You can paint the stars any color to match your decor. Anything from turquoise, to gold, to red would be pretty. You can even mix paint colors to get the exact shade you want.
-Use different colors of glitter. You could add colored glitter to the white stars. I also think silver or gold glitter would be really pretty. Or change things up and use different colors of glitter so you have a variety.
-Tie a ribbon bow to the top of each star, or even tie on a small piece of greenery. Get creative!
-Change up the size. I used stars that are all the same size, but you could make some large stars and some tiny. You can find paper mache stars in a variety of sizes, so use whatever fits your need. I even think it would be beautiful to use a huge star as a tree topper!
MORE CHRISTMAS DECORATIONS:
- Book Page Christmas Tree Banner
- Yarn Felt Poinsettia Wreath Tutorial
- Circle Punched Christmas Trees
- Book Page Christmas Ornament
See all my CHRISTMAS IDEAS.





Hi Kara,
I love your Christmas Carol Pictionary cards. How do I download them? Or can you send me the pdf? I have a party this weekend and I think it would be so fun to play.
Great idea!
Cheers,
Ann Marshall
Here is the link to the Christmas Pictionary post Ann: https://www.creationsbykara.com/christmas-songs-pictionary-free-game/
You can download the game from there. Have fun!!