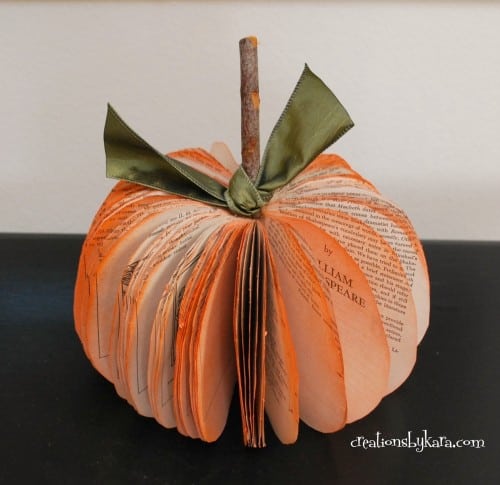
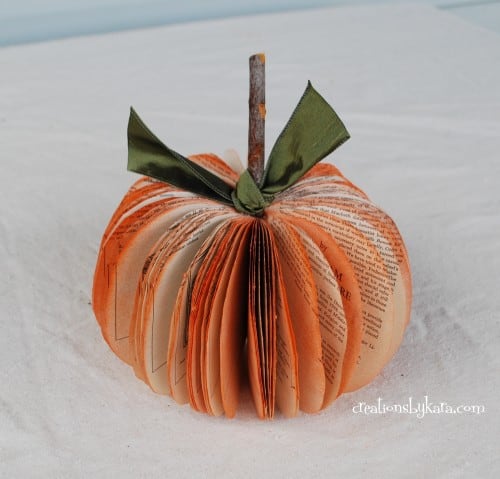
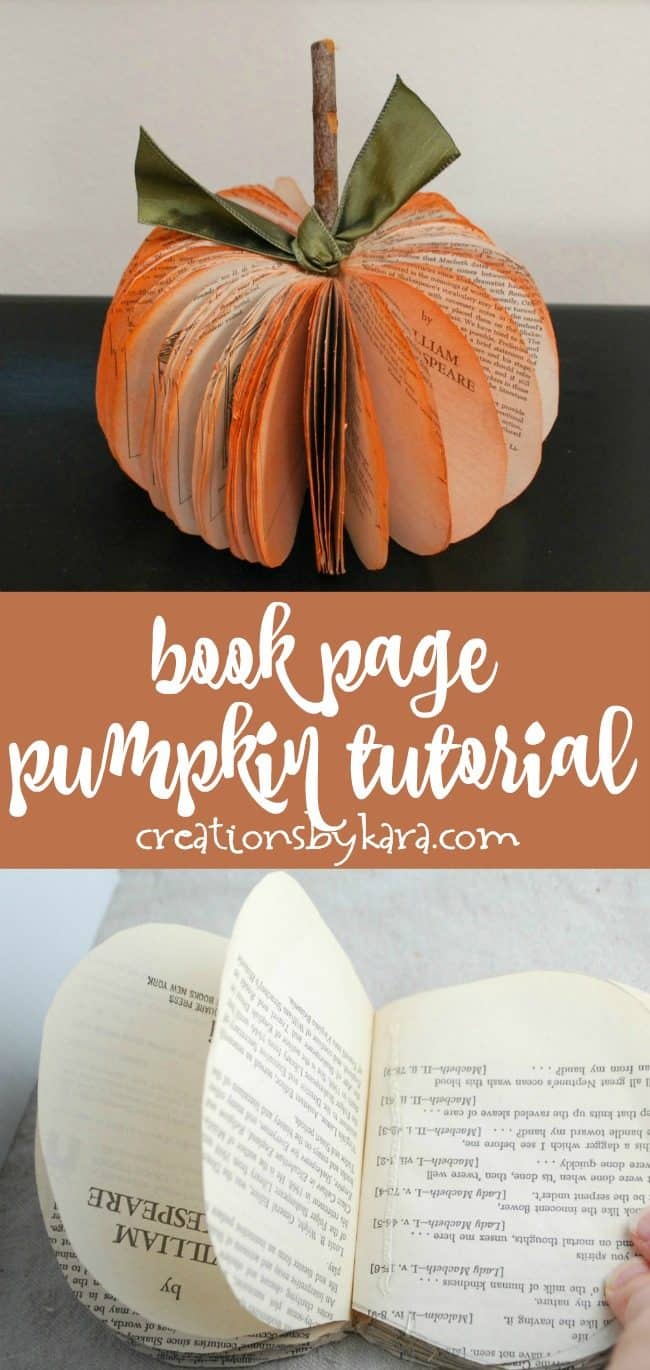
Book Page Pumpkin Tutorial . . . with an old book and a few basic craft supplies, you can make a beautiful pumpkin that can match any fall decor!
I love decorating with book pages. I love decorating with pumpkins. It was only natural that I combined the two together to make Book Page Pumpkins.
This is such a simple craft project, but the results are stunning. Everyone who sees my book page pumpkin comments on it!
I saw a few book page apples on pinterest, and thought that a pumpkin would be totally cute as well. I buy damaged books at the library for pennies and set them aside for projects like these cute pumpkins. Hope you like them as much as I do!
Book Page Pumpkin Tutorial
Supplies:
-Paperback book
-Paper and pencil
–Sharp scissors or exacto knife
–Hot glue gun and glue
–Spray Paint
-Stick for stem
-Scrap of ribbon or fabric
Instructions:
1- Make a pumpkin shape out of a piece of paper. I roughly drew one, then folded the paper in half and cut it so it would be symmetrical. 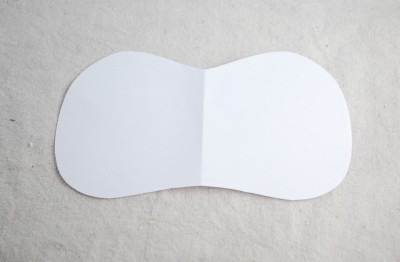
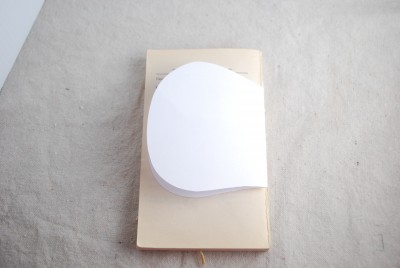
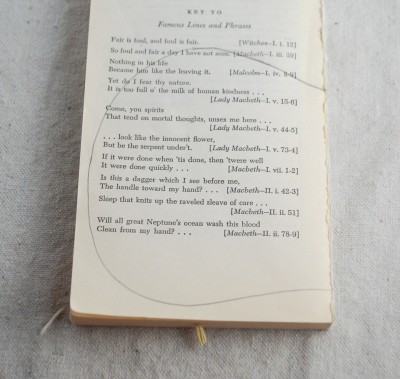
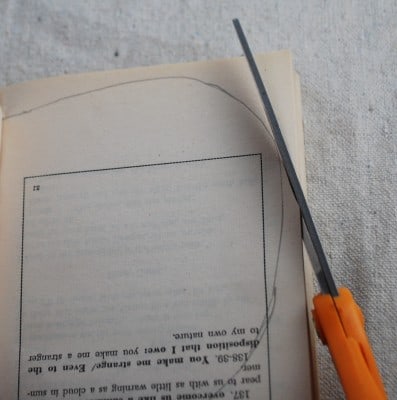
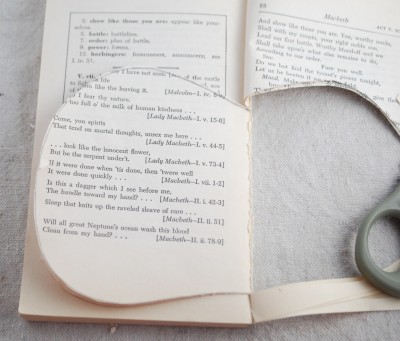
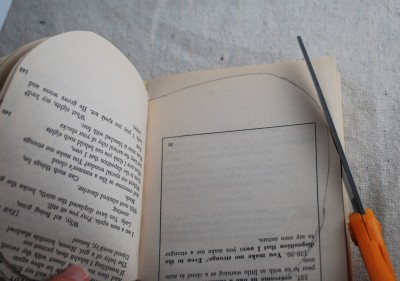
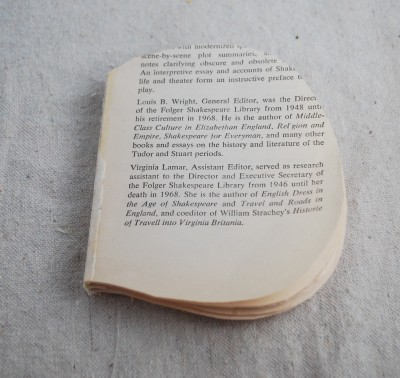
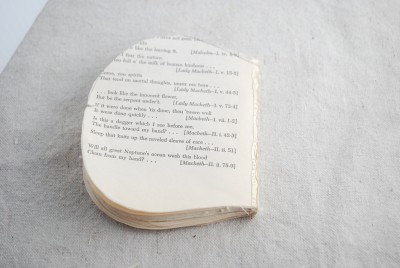
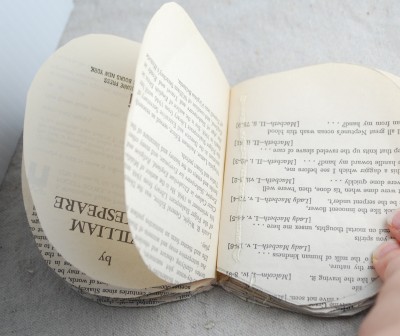
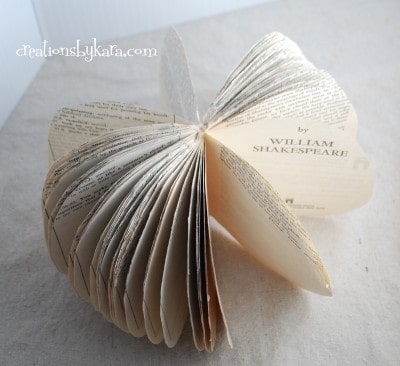
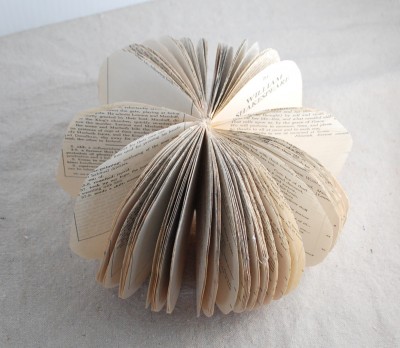
Yep, you can totally spray paint book pages. Just use a very light touch, you don’t want it drenched or anything. One light spritz is all you need.
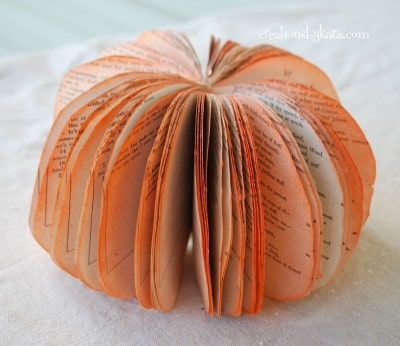
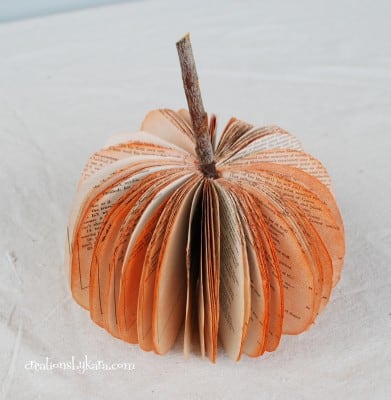
And just because I love it so, here is another shot of it sitting on my entry table. I think I need to make a few more book page pumpkins so it has some friends. 😉
If you like this book page pumpkin, check out these book page projects:
This project was originally published September 2011, it was updated 9/11/2018.


Thank you. This helped a lot.
So happy to hear it! Hope you enjoy them for years to come!
When u say inside edges are you talking at the spine between the pages or the top and bottom of the pumpkin shape? I’m confused or making it more complicated than it is 😂
You want the line of glue on the inside edge close to the spine, running from the top to the bottom. Hope that helps.
What a novel idea! I love fall decor and these really make a statement for the season.
I was reading a book that I just couldn’t get “into” and discovered this! AWESOME! I’m sure the author might not be as pleased but I am!
Haha. At least the author’s book is being used for something beautiful, and not just being dumped in a landfill somewhere. 🙂
Love your ideas.Excellent for using re-cycled materials. I have a small budget for my learning group, so this is most helpful. Thank you
I love book page crafts – especially since I cut a ton of pages out of some books to make book boxes! Now I can recycle some old paperbacks! Pinning.
Number 8 and 9 are not clear. I have looked at this for two days and still does not make clear since to me. really wanted to make this. try to find it somewhere else, thanks anyway….
I teach children’s Sunday School, and art at the boys/girls club.
Such a cute idea. Cheap also. You could also do Christmas ornaments,
Easter, etc. Thanks so much
I know, it’s so versatile. I’m hoping to try some ornaments this Christmas. 🙂
Poor Shakespeare, turned into a pumpkin 🙁 what great use books are today
Haha! I’m pretty sure Shakespeare would be thrilled to be sitting on a coffee table as a pumpkin rather than rotting in a land fill like most old falling apart books end up. 😉
GREAT idea!
I made 24 book pumpkins to decorate for a staff Halloween Potluck at the high school where I work. With so many to make, I thought it would take a long time to cut them. Then I had the idea of having my husband and son cut the books with the bandsaw. They had 20 of them cut in about 20 minutes. They all had a nice shape and were so cute.
Oh my gosh, genius idea. I’ve got a scroll saw, I’ll have to see if it will work. It would be so much faster!
1 years later, I’m ready this post. Band saw. Genius. My husband just bought one. 🤔
**10 years later**
wow i love it they would look fab on a fall mantel. great tutorial. you have had so many comments on this post it took me ages to scroll down to the reply box lol, thanks for sharing xxx
I love your pumpkin, and your blog is very nice, too. I linked to this post on my blog and posted your photo. Thank you for sharing your ideas. I will come back often.
Thanks so much!!
thanks for your idea. regards
Wow! that is such a clever idea-thinks for sharing-it look fantastic
This is just adorable.
so simple, and so so nice !!!
thanks for sharing !
This is REALLY CUTE! TFS, I’m going to have to make one and use up some of those old photos, that will make a nice table top to remember! Thanks bunches.
So cute. I am thinking if I dust off my scroll saw. I could zip one out – Question how many page book did you use??
Love this! Shared it on my CraftBliss Facebook page. Thanks for Creating and Sharing!
How thick of a book should I use? About how many pages was yours?
This is so cute! I linked up to it on my post on the Green Baby Diaper Service blog greenbabywilmington.blogspot.com/2011/10/green-halloween-crafts-pumpkins-from.html) …I’m trying out some fall crafts, and I found your tutorial to be really helpful and cleared up my confusion about the gluing thing. So thanks!
I think this is such a great idea. And I just collected a boxful of books that I was ready to donate to our local Boys & Girls Club, but I think that I may need to slide a few out to make this craft with my kids! I plan to feature a picture and a link to this post today (10/9) over at momof6.com.
When I found out that there was a tutotrial for this project on beneath my heart dot net, I had to zip on over. But when I saw you using a book, I was like, “WHAT!” What if it was a good book! Then I remembered…the dollar stores sale books, so then I caught my breath and was totally in love with the project again, 🙂
Have you ever made one of these to look like a Christmas ornament? I think I might try it!
these are so cute and easy… thanks for sharing the tutorial! i just posted my own here and added your link: the20spot.wordpress.com/2011/10/04/a-fall-diy-book-page-pumpkins/ 🙂 will definitely be back to check out more of your stuff!
i loved the pumpkin book ty i was thinking
u could let them color the inside of the book
or cut halloween thing and glue it in the book
childern or the older persons day care be able to all have a part in making the Pumpkin book then u could shape it frist before u let the have it and u could add the paint on the book before the work on it to . it be a group thing to work on,
hugs prayers love darla
I fell in love with this pumpkin the first time I laid my eyes on it! I just knew that I had to make one. Thanks Kara, the tutorial was very helpful. I made one yesterday, and I think it came out really good.
I was reading a book that I just couldn’t get “into” and discovered this! AWESOME! I’m sure the author might not be as pleased but I am!
We featured your tutorial on our virtual online shopping mall to share with everyone:
southernbelleshoppes.ning.com/photo/book-page-pumpkin-tutorial?context=latest
We hope you stop by and take a peek and join us!
Wishing you a beautiful day!
Jackie
This is completely fabulous!! Something I will def have to try!
Whoops, forgot to put my info in! 😉
love your pumpkin, kara! i’m featuring it tomorrow 🙂
happy crafting,
linda
I love this pumpkin and want to try making it. Does it matter how thick the book is?
This looks great! I’m going to give it a try. Thanks for sharing.
Eveline.
This looks great! I’m going to give this a try. Thanks for sharing.
Eveline.
I absolutely adore this project! I had so much fun the other night doing this with my family, with a cup of tea. xx Its going to look absolutely fab as a decoration at my vintage halloween party! Your ideas are truly inspiring. xx
This is SUPER cute!! Thank you for sharing. I am going to have to find an old book or two and make my own friend named Krylon!
Happy Friday to you Kara…I wanted to let you know that I am featuring this beautiful tutorial on my blog today…I can’t wait to try this out 🙂
If you get a chance I would love for you to stop by!
creativecarmella.blogspot.com/2011/09/friday-favesfall-finds.html
Really cute pumpkin and I like the apple idea also!
Wow! I LOOVE this! What a fabulous idea! 🙂 I am featuring it on my FB page 🙂 Have a wonderful day!
Crystal
Homemaker in Heels
Thanks so much Crystal!!!
This is so cute! Thanks so much for sharing!! I’m a teacher and I totally want to make one and spray paint it red to be an apple on my desk! :):) Love your blog and am your newest follower! xo, Reannah
That is an awesome idea! I might have to make a few apples for teacher appreciation gifts. 🙂
Love this! My boyfriend, mom, sister and I will be making these Sat. I will be sure to blog about it and let you know how we make out! Thanks so much for giving us a nice festive craft to make 🙂
I’d love to hear how they turn out! I hope you all have a blast!
Going to feature this thursday afternoon at bacon time. Thansk for linking.
Very cute & thrifty idea.
What a cute little pumpkin that is! Another great project made from book pages… Love it!
I love this! I would love to feature it on Reduce, Reuse, Upcycle. Thanks!
Love this!
I love this! I know what I’m doing tomorrow!!
Littlemudpies.blogspot.com
definitely doing this! thanks so much for sharing. so creative, but so simple! xo.
Hey there! I featured you today at Southern Lovely. Grab a button if you’d like!
southernlovely.blogspot.com/2011/09/show-share-4-features.html
I used old Telephone books. You can also get 2 Small one’s or 1 Large one out.
Hi Kara! Just wanted to let you know I’m featuring this on my blog! I can’t wait to make some to add to my fall decor! I’m so glad you linked up with us at Show & Share!
Marie
mylilpinkpocket.blogspot.com
So cool and creative. I love that you have taken something that might have been thrown out (I can’t tell you how many old books are sitting around my house!) and repurposed it. Fantastic!
So stinkin cute!!!!! Thanks for sharing!
This is just the cutest pumpkin! Thanks so much for sharing your idea, I’m excited to give it a try. 🙂
Friend, this couldn’t possibly be more adorable! I loved this project so much, I shared it in my Saturday Seven lineup this week! positivelysplendid.com/2011/09/saturday-seven-no-22.html
I love this! It is so cute! I am definitely going to make one of these!
This is such a cute idea! I featured it today at So Creative. soverycreative.blogspot.com/2011/09/fall-roundup.html
I LOVE this idea!Is so cute!Emerencia.
This is so cute, trying to decide what book I want to use right now. I would love for you to share this at my any linky goes party.
Big, puffy heart LOVE. The simplicity and colors are perfect.
Such a wonderful idea!! I can’t wait to try this out…thanks so much for sharing!
Such a cute idea. I love how the paper edges are colored. Visiting from TT&J.
This is soooo darn cute…thanks for sharing it!
Blessings,
Linda
Love this. You could do so many different shapes this way. Very nice.
Love this idea. I’m a retired school librarian, so I like anything book related. I even have some old books I’ve been wondering what to do with.
I love this idea…be cute as a pear I’d think too!
Yes it would. Now I’m going to have to make one of those too!
This is sooooo cute! I absolutely love it…very creative! 🙂 I’m hosting a Fall Craft Challenge right now on my blog and this week’s theme is centerpieces. I would love for you to come link this up; my readers will adore it. I’m totally pinning this right now too.
oneartmama.blogspot.com/2011/09/falling-for-crafts-challenge-1.html
ps – how appropriate to use Macbeth for a Halloween decoration…lol…talk about creepy.
Haha, I didn’t even think about how I’d used Macbeth. But yes, so appropriate. 🙂
That is incredibly cute – I think even I could do this 🙂
fantastic. love the orange spray paint. how great would this be with a halloweeny/fall book, too.
love, love, love pumpkins! I am doing this and making some as gifts!!
That is so stinking cute! Great tutorial to! I will be making these to add to my fall decorations! Thanks for linking up with us at Show & Share!
Marie
mylilpinkpocket.blogspot.com
I just posted on my blog about Halloween Decorations and I added a link to your pumpkin! I am going to have to find some old books!
veskebylindsay.blogspot.com/2011/09/halloween-ideas.html
Thanks Lindsay! I love the other ideas you shared as well. 🙂
love this! I’ve pinned it for my future crafting.
Thank you!!!
I must make one (or ten) of those, how adorable – thansk for sharing!
LOVE this! And I am most definitely making it.
Wow! It’s wonderful!
Oh how cute! You can pick up paperbacks for a dime at my thrift store, so I know what to do with them now 🙂
Wow, you’re lucky. They’re usually a dollar here. I find then the cheapest at the library when they get rid of the old books.
Great Pumpkin. I love it. Good luck.
So cute Kara!
I love how it turned out! It reminds me of my book paper apple nobiggie.net/2010/11/make-apple-out-of-book-paper.html)
Now I need to make a pumpkin too! Thanks for the inspiration!
I totally remember your darling paper apple Kami! In fact, I pinned it so I wouldn’t forget. 🙂
Very cute idea!
This is soo cute!!
This is seriously one of the most creative projects I have seen for a while! I adore this little pumpkin & must make one for my Halloween decor! Thanks for the awesome tutorial! I would love to have you share this at Show & Share!
southernlovely.blogspot.com/2011/09/show-share-4.html
I really think your pumpkin is simply great!!!
This is so cute Kara! I love the book pages – such a great idea!!
This is too cute! Great idea! Thanks for the tutorial, I will have to try 🙂
I love, love, love this! It is so dang cute! One of my fall favorites for sure! I stumbled and pinned this too – I just love it that much!
Thanks Amanda- I totally appreciate it! You are awesome!
Love, love, love this! Can’t wait to try it! Stop over for a visit sometime!
So adorable! I love the wood stick, nice job!
This is just to cute and I am going to put this on my wish list
What a fun idea! LOVE IT. I’m your newest follower. Found you through The Shabby Creek Cottage. Visit me at afabulesshome.blogspot.com
I LOVE this idea!! That is so cute! Going to DI today to find me some books. Thanks!
Love this! Gonna hit Goodwill for some books later today!
Alright Kara–this is amazing! I seriously LOVE this idea. Love that little ribbon stem!
Thanks Alison! Ribbon makes just about anything better, doesn’t it?
cute!!! I love fall decorations!! this is awesome!
I love this! I am going to have to pin it and try to make a little pumpkin patch of my own. Time raid the library to see if they have any free paperbacks to give away!