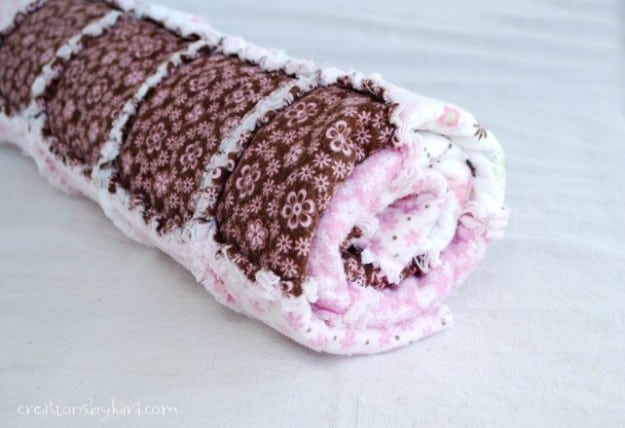
If you have never made a quilt before, a rag quilt is a great place to start. Even if you are new to sewing, I promise that you can make a gorgeous blanket with this baby rag quilt tutorial!
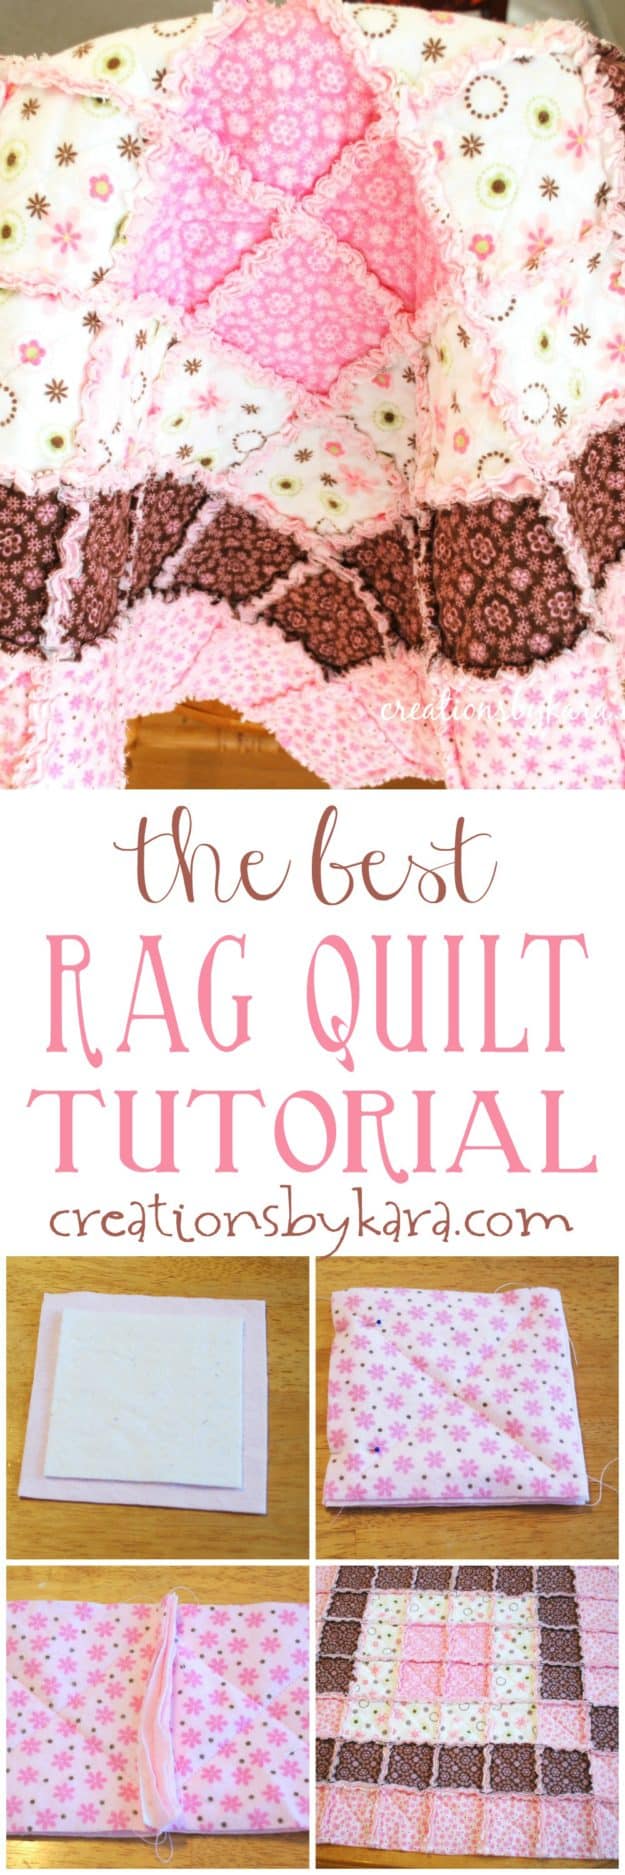 I am going to walk you through the step by step process of how to make a rag quilt. If after you have read through the tutorial you still have questions, please feel free to contact me.
Unless you are asking questions about math, like how much fabric you will need to make “x” size of quilt. I stink at math. I have no idea how to figure out how much fabric you need for a queen size. . .or exactly how much of each fabric you should buy. . . or anything that involves numbers. Trust me, you do not want my help in the math department. I usually depend on the ladies at the fabric store for all those questions. 🙂
I know it seems a little crazy, but I find it very therapeutic to work on baby projects. My latest was making a rag quilt. Just finished it this weekend. I’ve always loved them and wondered how they were made. My friend Tracie (who is hopefully picking up her daughter from Korea this week), showed me how.
It’s really quite simple, but does involve a few steps. I worked up some rag quilt directions for you just in case you have a hankering to make a stinkin’ cute baby blanket. 🙂
Fabric Tips:
-Flannel is the best fabric for rag quilts, because it frays the best.
-Cotton also works really well, it just doesn’t make seams that are quite as soft and fluffy. -Minky does not fray, so it isn’t the best choice for a rag quilt. You can use it on one side, but if you use it on both your seams won’t fray, they will just look sloppy. If you do decide to use it on one side, I’d recommend using flannel for the other side.
-If you use cotton or flannel, I recommend washing the fabric first. If you use minky, you don’t need to because it doesn’t shrink.
Hope that helps clear up confusion. 🙂
OK, are you ready to make a SUPER CUTE rag quilt?
Baby Rag Quilt Tutorial Part 1: Prepping Your Fabric
Supplies: (contains affiliate links)
-Flannel (See fabric tips below)
-Warm and Natural Batting
–Fabric Scissors
–Spring Loaded Scissors for clipping the seams (not required, but very handy)
–Straight Pins
– Sewing Machine
-Thread that matches your fabric
Instructions:
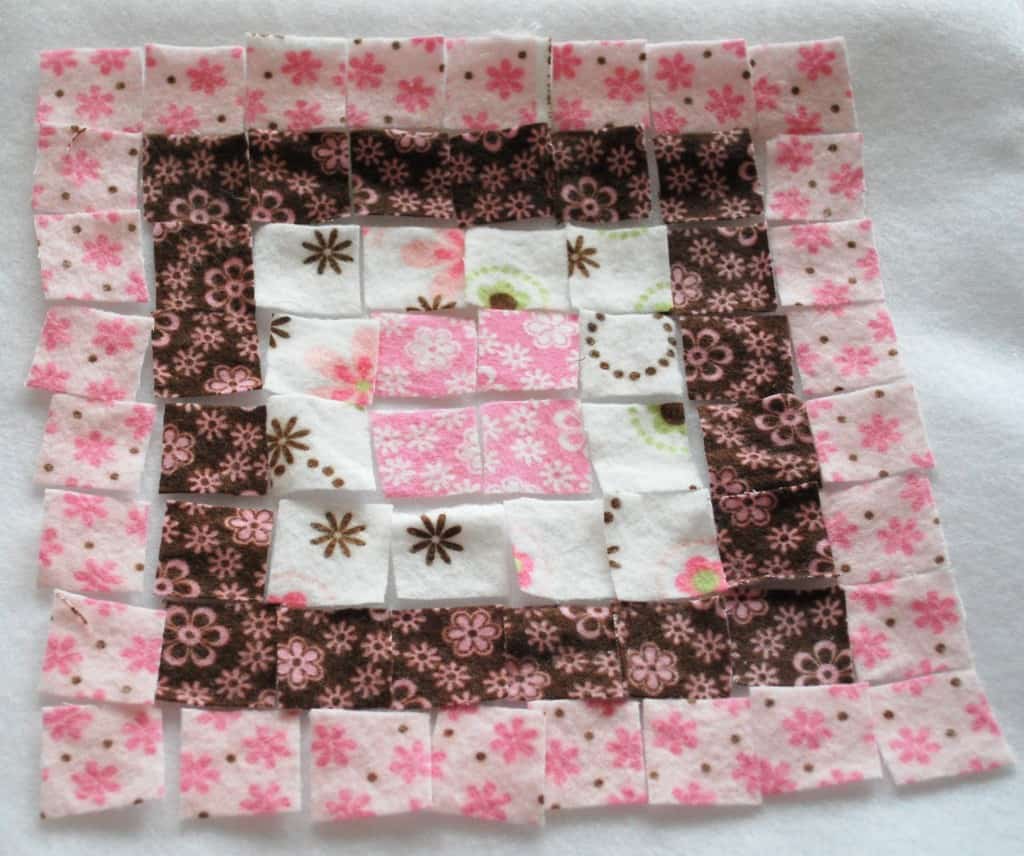
1-The first thing you need to do is pick a pattern for your quilt, then decided the size you want it to be. I cut up a bunch of little 1″ squares so I could arrange them in different patterns. I tried a few and liked this one the best:
It has 64 squares in it. I decided to cut my squares 5″. This will make a quilt that is 32×32″. You can use any size of squares that you want and make your quilt any size that you want. For this size, I used 1 1/4 yards of fabric for each side, so a total of 2 1/2 yards.
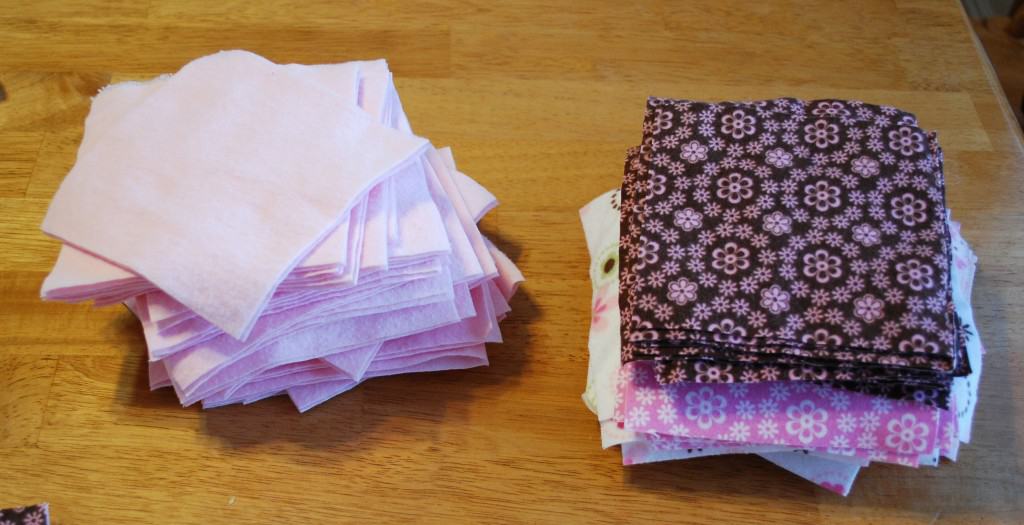
2-Next you will need to cut out all of your fabric squares. I used my rotary cutter, and I highly recommend that. You can cut them by hand, but it is very hard to get them all straight, so it is harder to sew it together. Refer to your pattern to know how many squares of each fabric you need to cut. (TIP: If you lay your pattern out on a piece of felt, it won’t slide around.)
I decided to make the back of my quilt pink, but you could use the same pattern on the back and the front if you like.
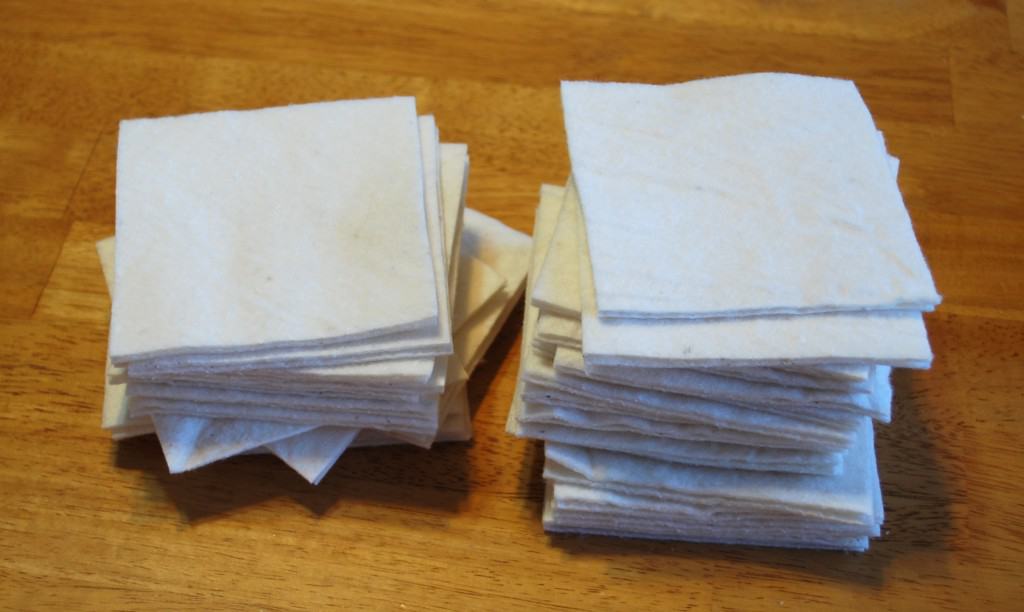
3-Next you need to cut out your batting. I used warm and natural. It needs to be cut one inch smaller than the fabric squares. I cut my pieces 4 inches. Figured out that math all by myself thank you very much. 😉
Baby Rag Quilt Tutorial Part 2: Sewing Your Rag Quilt Together
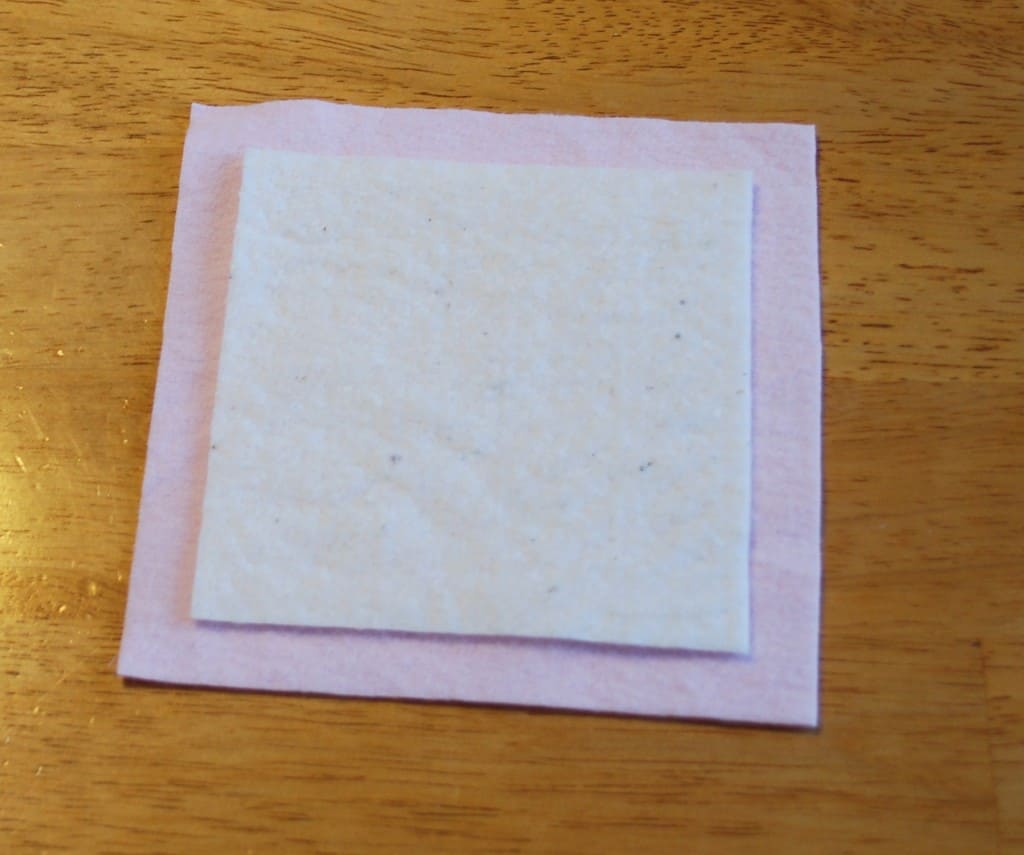
4-Take your back fabric and place it right side down. Lay the batting on top of it. See how there is a 1/2″ border all the way around?
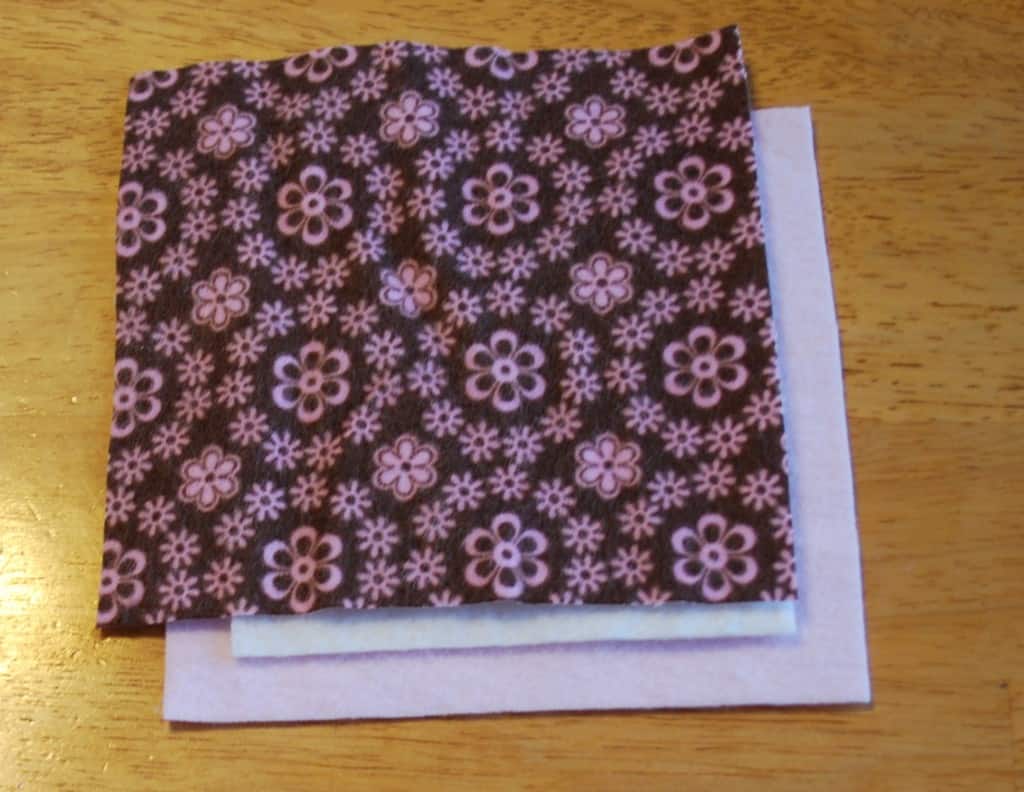
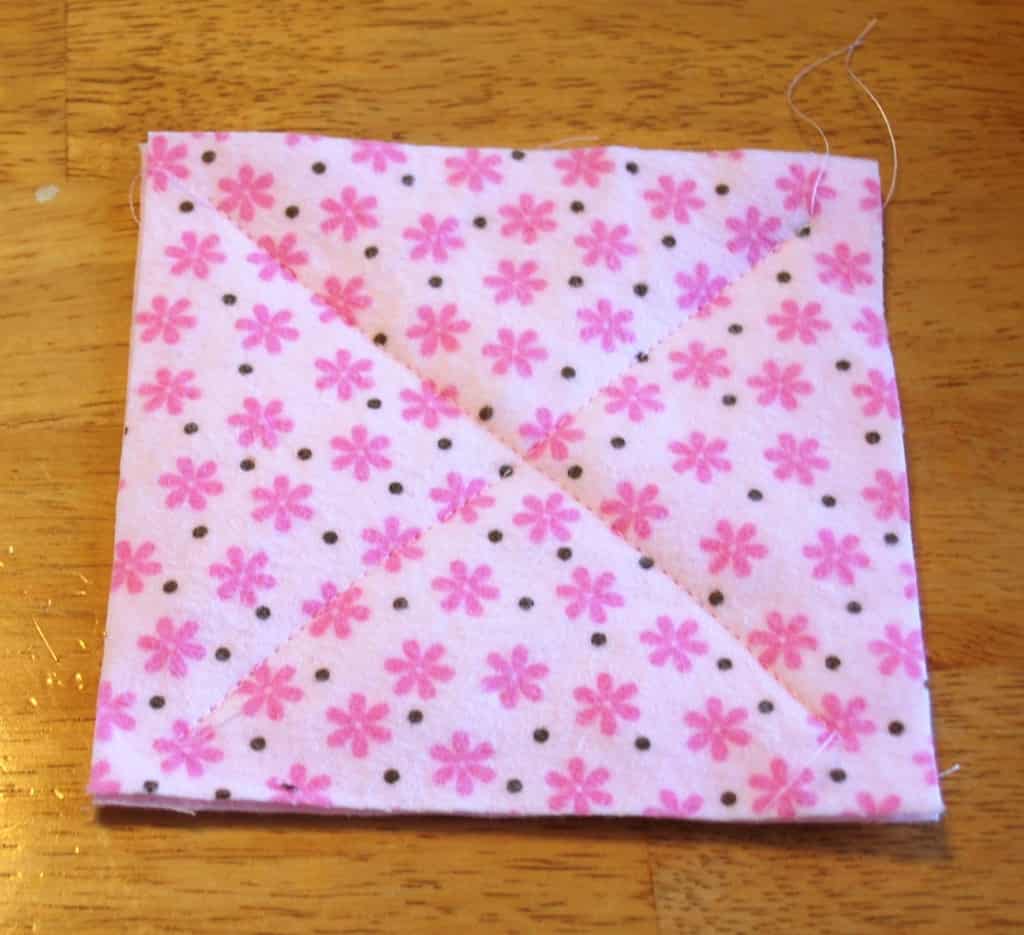
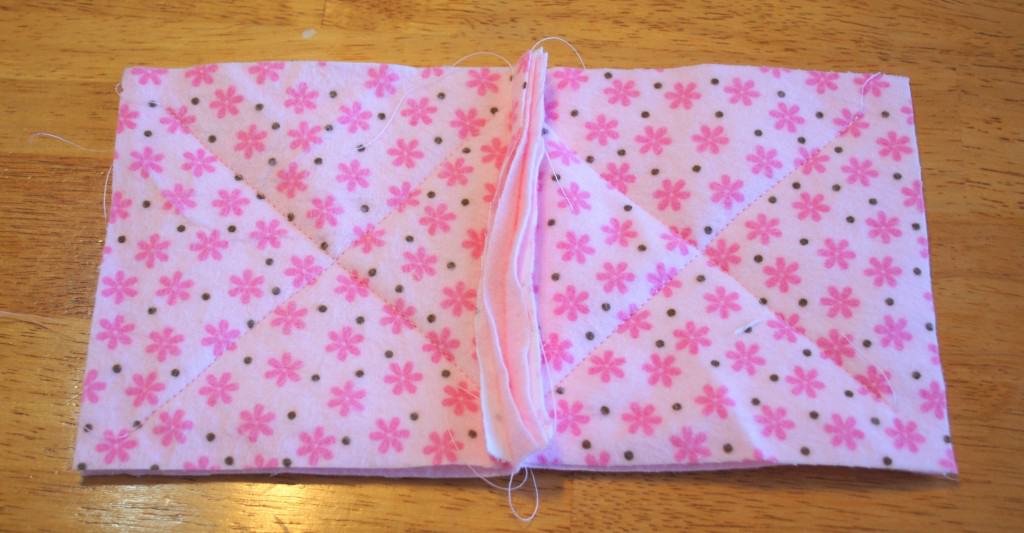
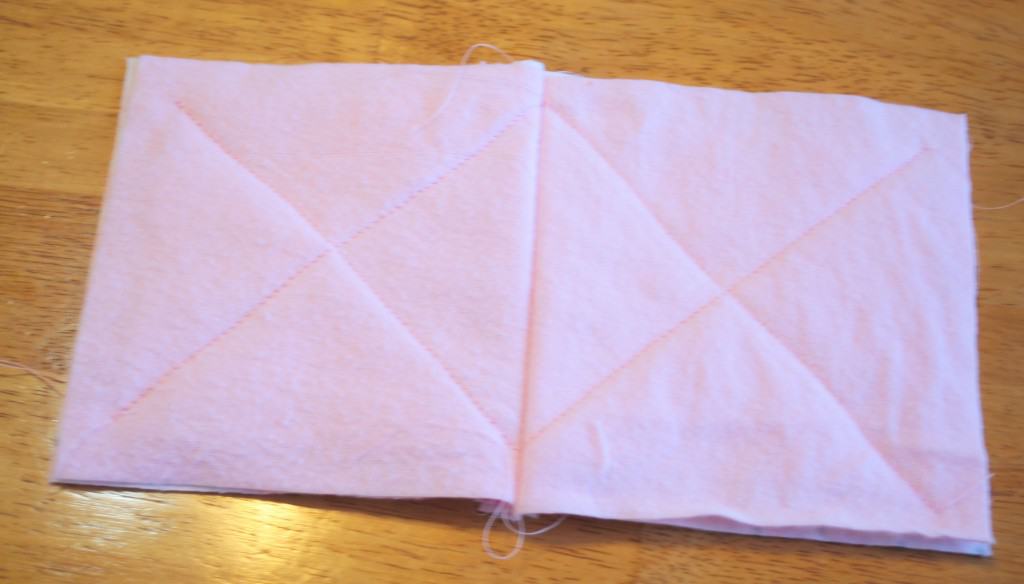
5-Using a straight stitch, sew an x in the middle of the square. Make sure you don’t sew all the way to the corners. You want to leave about 1/2″ at each corner. Basically you are just sewing over where the batting is. It was hard to see on the dark fabric, so I switched out for my pink fabric. Sorry to confuse you. 🙂
6-After you have completed all of your squares, it is time to start sewing them together. Pay close attention to your pattern so you are sewing them together correctly!
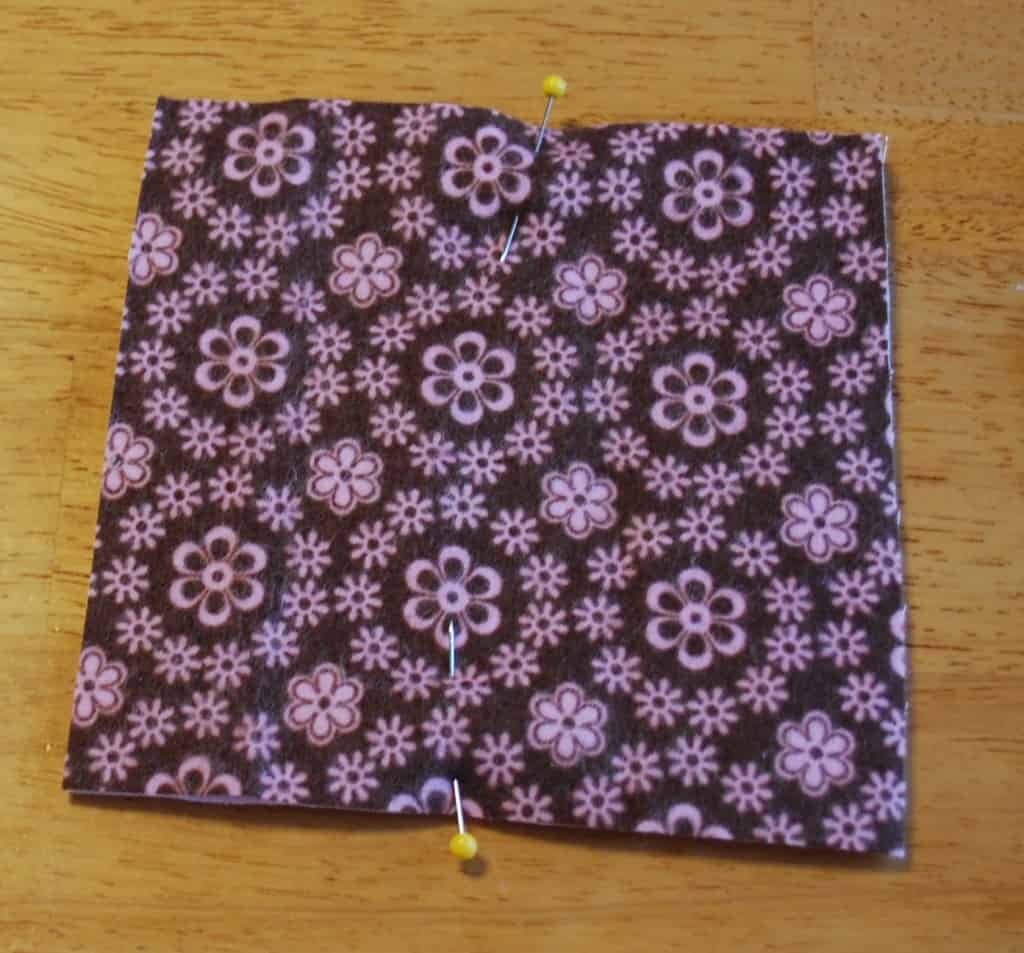
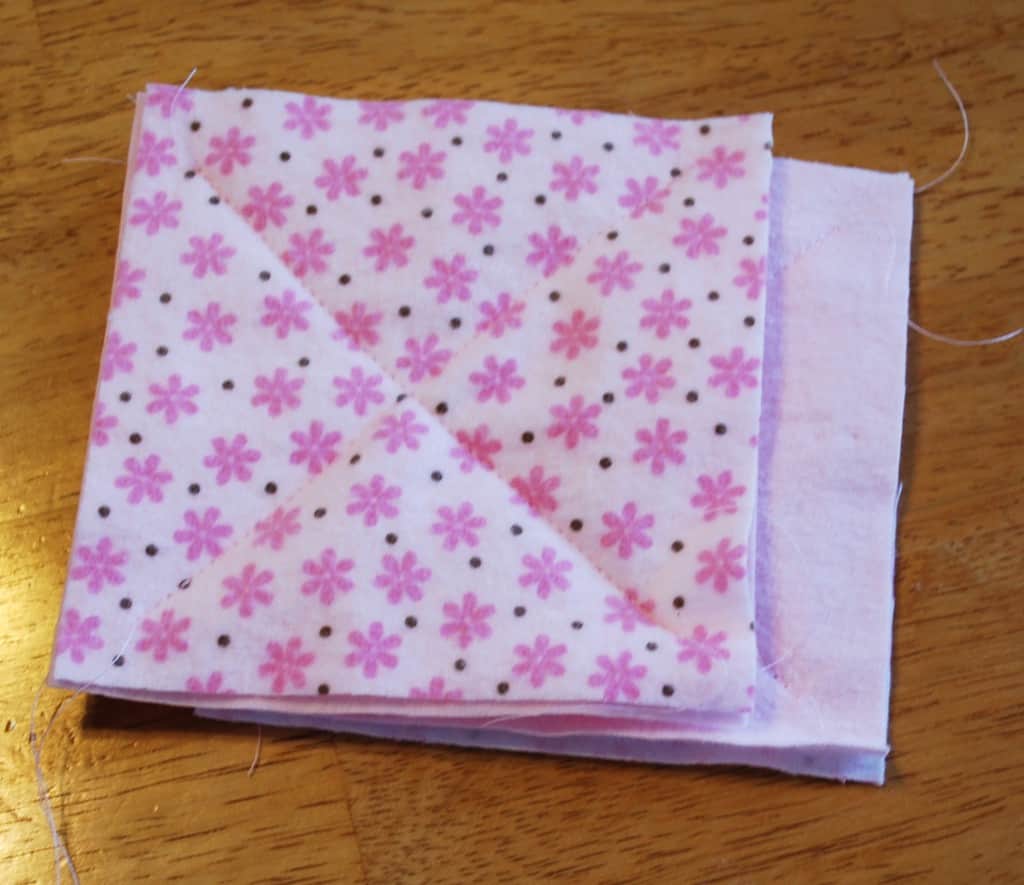
Take one square “sandwich” and lay it right side down. Place another “sandwich” right side up. Again, they are crooked just so you can see what it looks like.
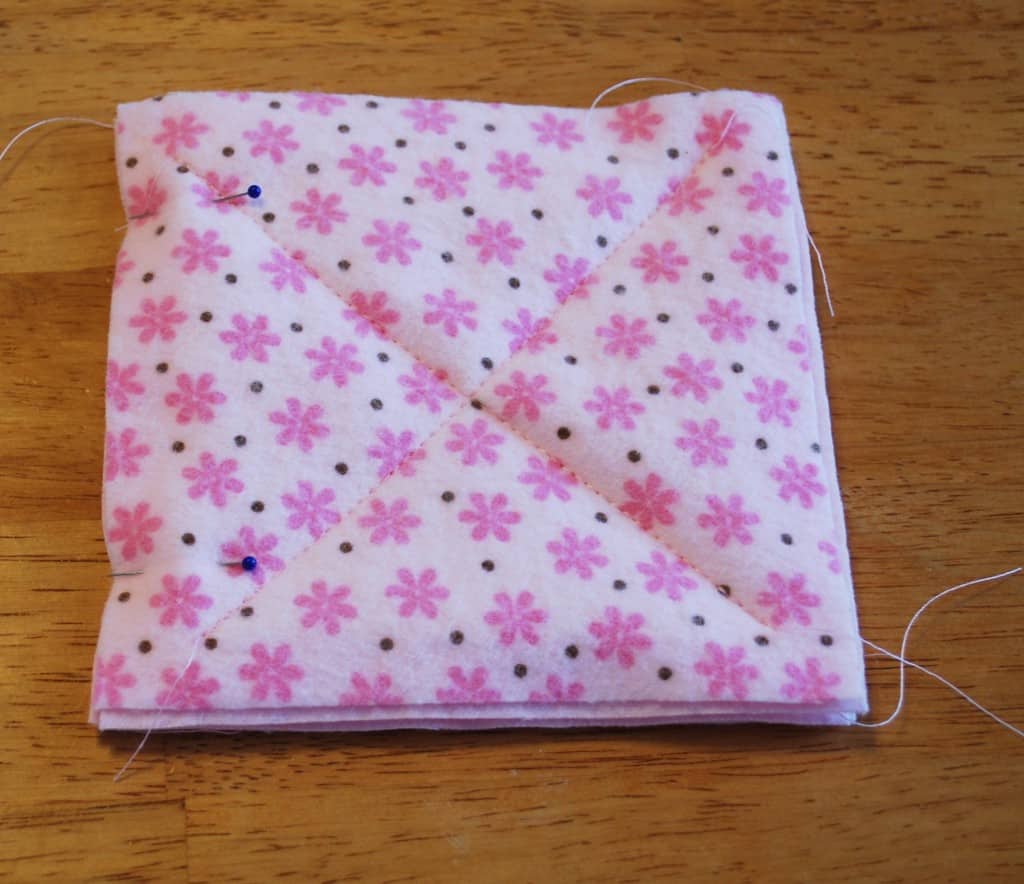
Line up all of the edges and pin one side:
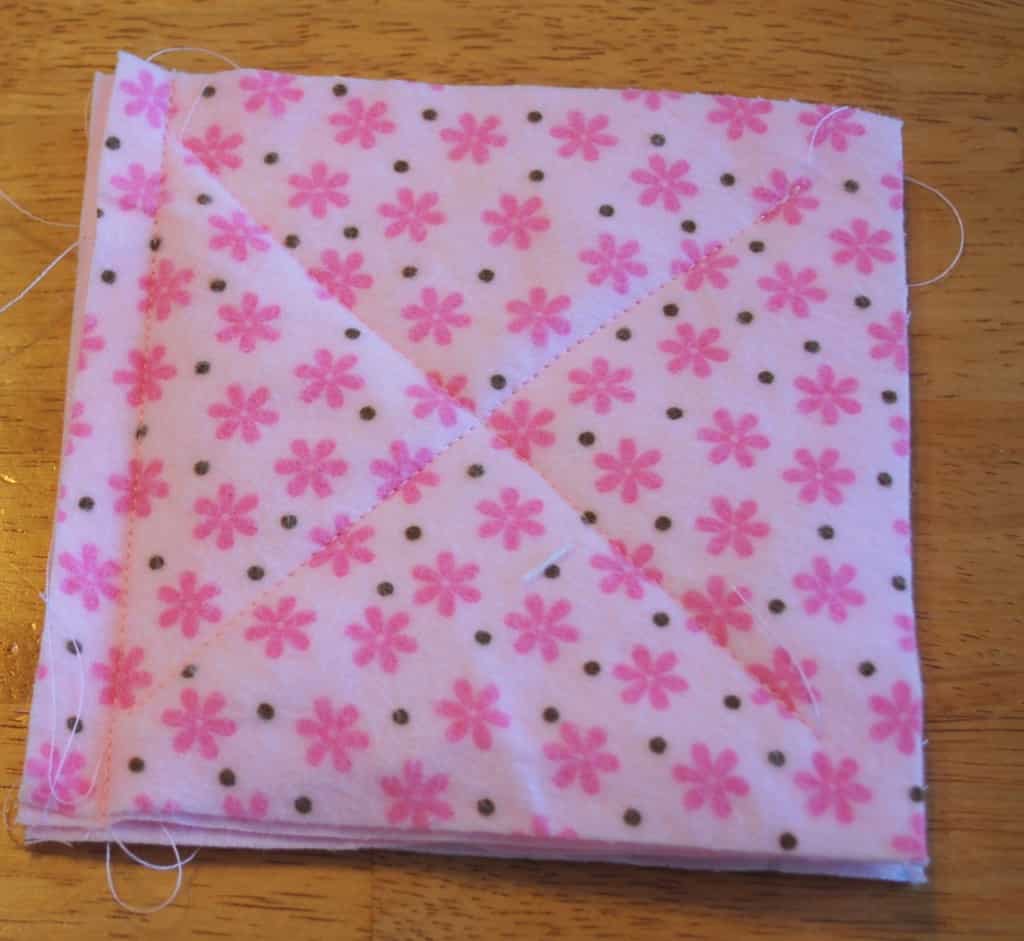
7-Now sew a straight line down the one side, using a 1/2″ seam.
When you open it, it will look like this on the front:
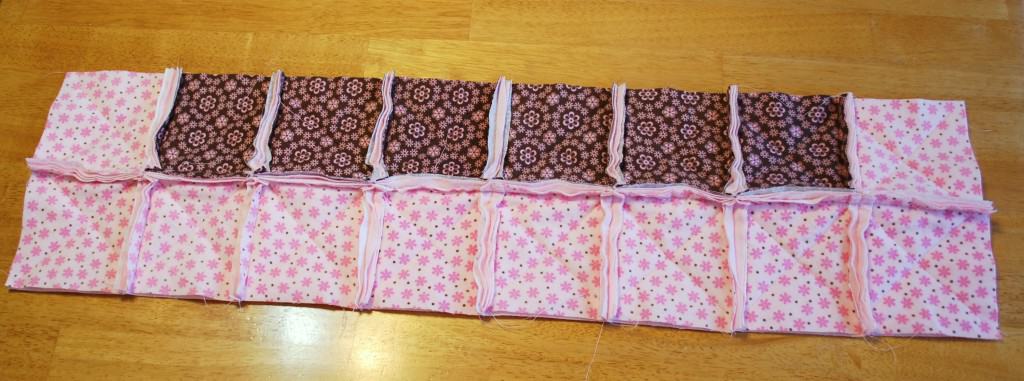
8-Keep going till you have finished all of your rows. Here is my first row all done:
9- Now it is time to sew your rows together. Yippee!
Take the first row and lay it right side down. Place the second row on top, right side up.
Match up all the seams and pin them together:
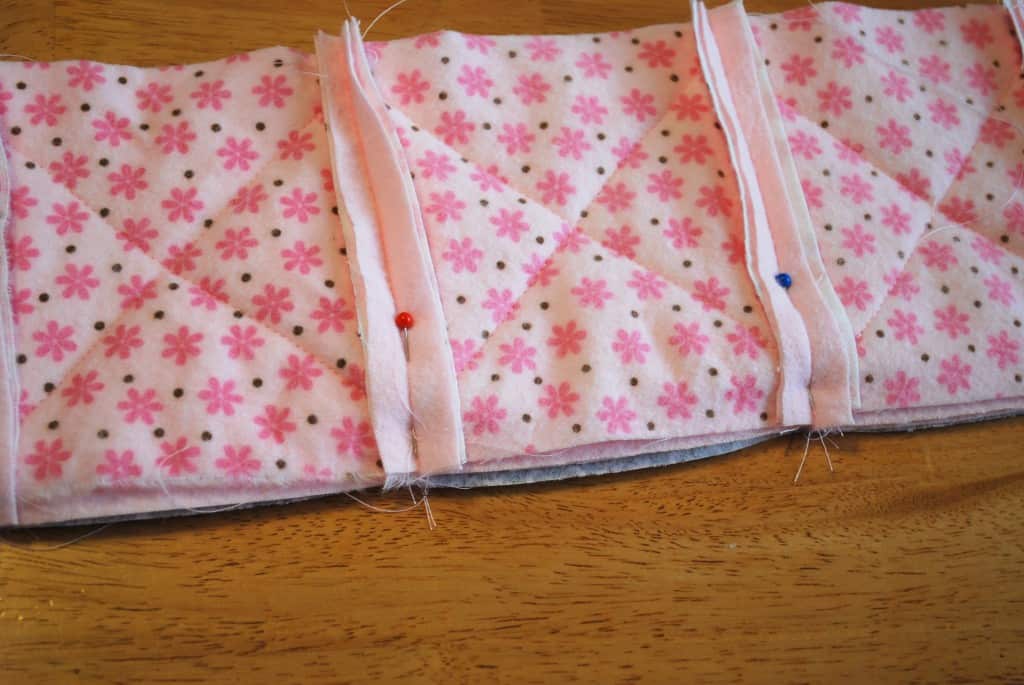
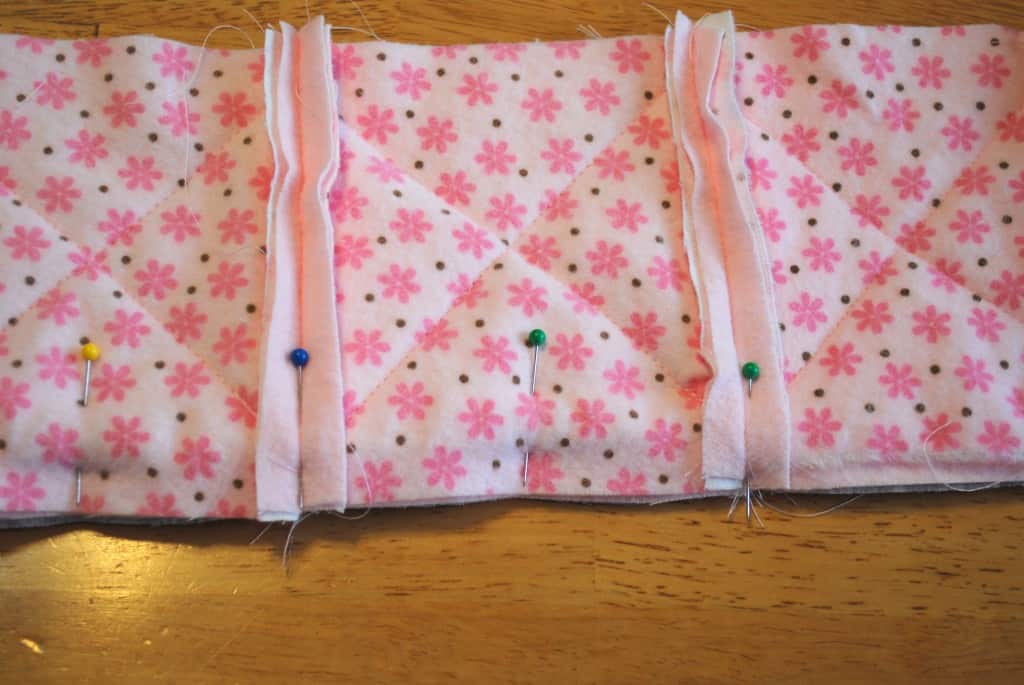
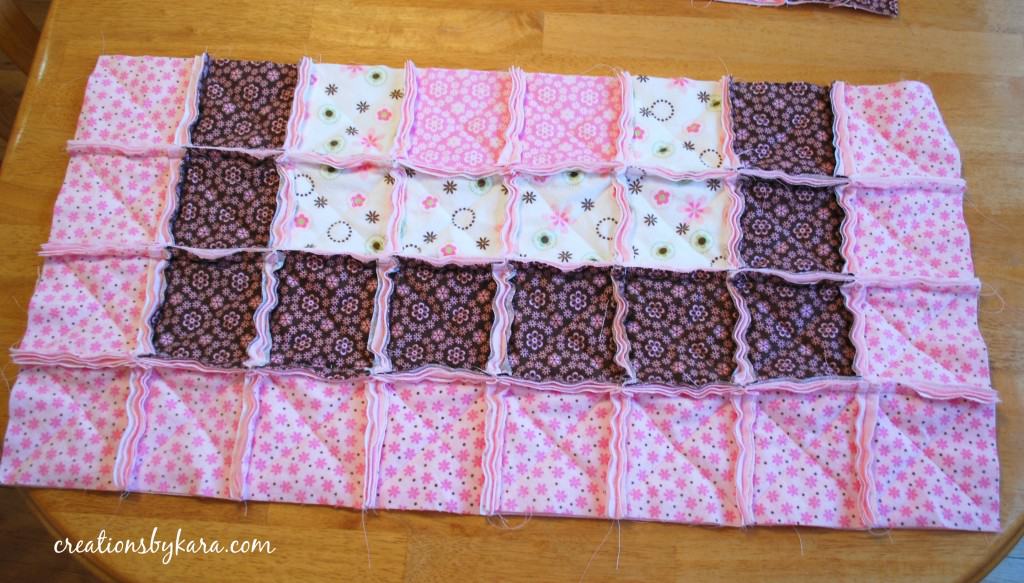 Keep pinning and sewing until you have them all sewn together.
Baby Rag Quilt Tutorial Part 3: Finishing Off Your Rag Quilt
11-When all of your pieces are stitched together , you will need to sew around the edge of the quilt. Sew a straight stitch all the way around the edge, using a 1/2″ seam.
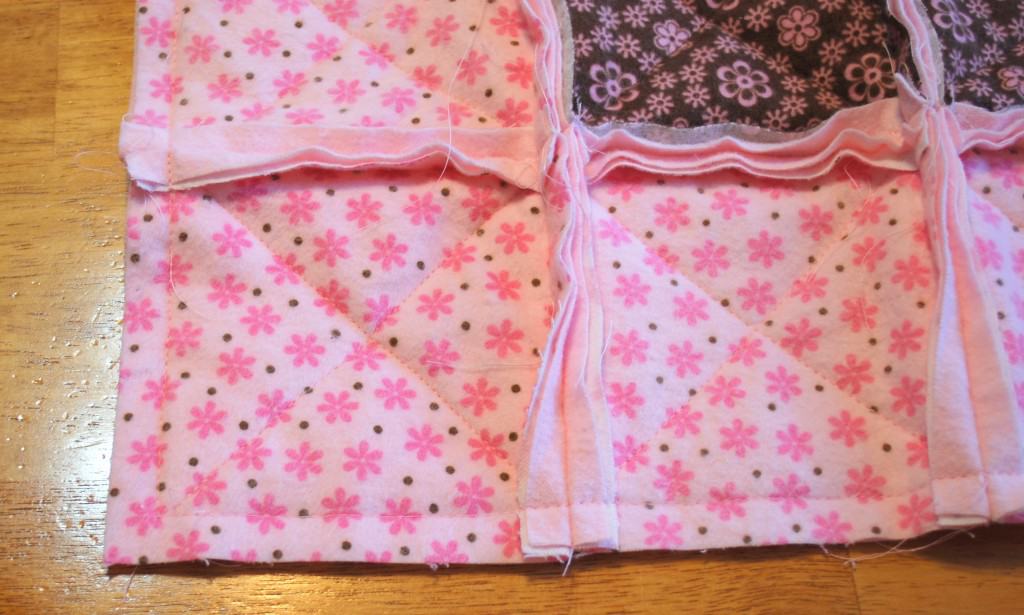
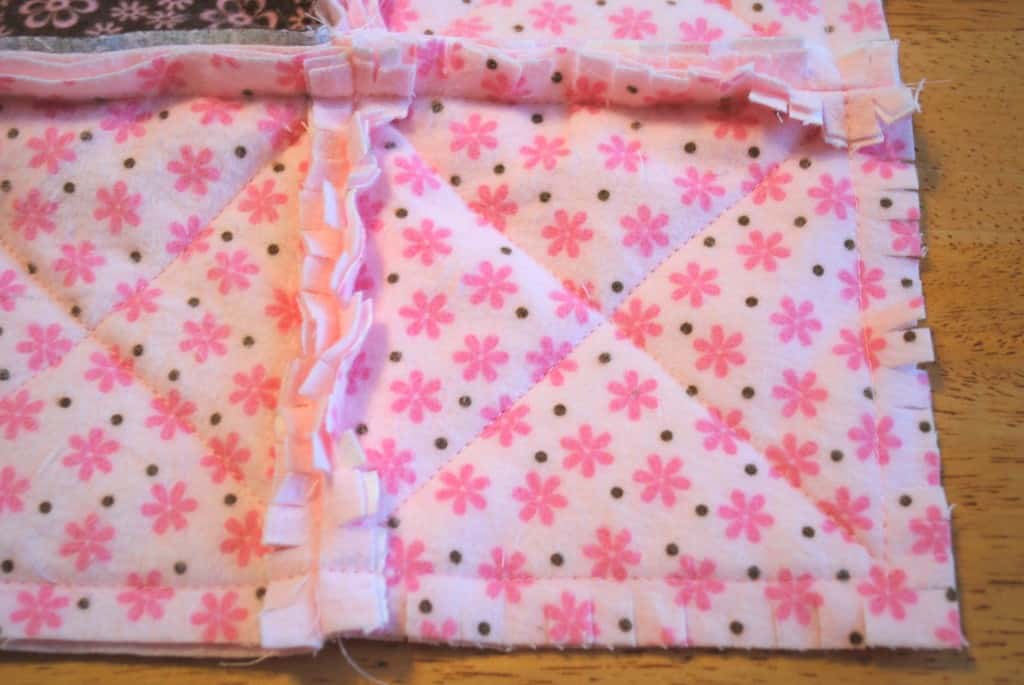 13-Clip off all of the loose threads on the back and front of the quilt.
We are getting soooo close:
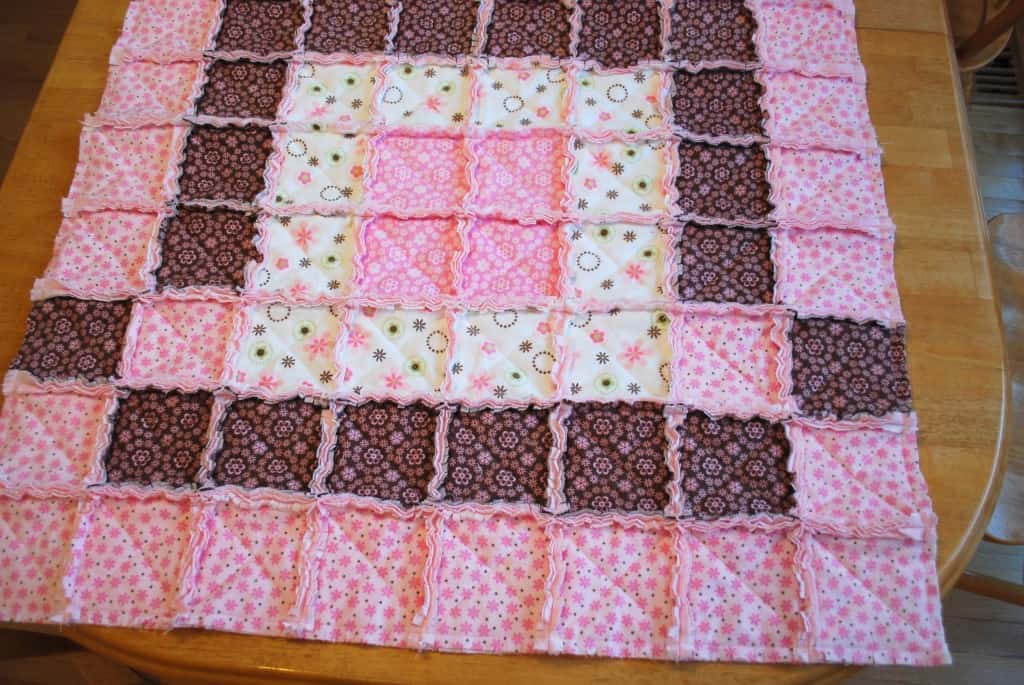
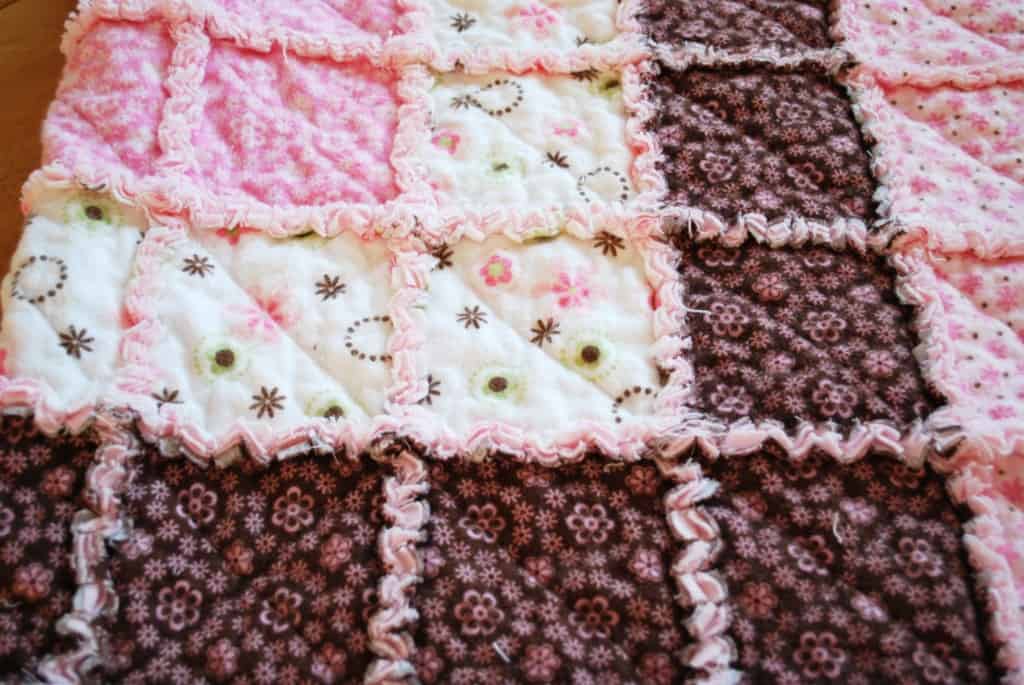
If you decide to make one and have any questions, just let me know.
If you love the rag quilt look as much as I do, you might want to check out my Rag Quilt Baby Bibs. Super easy and super cute!

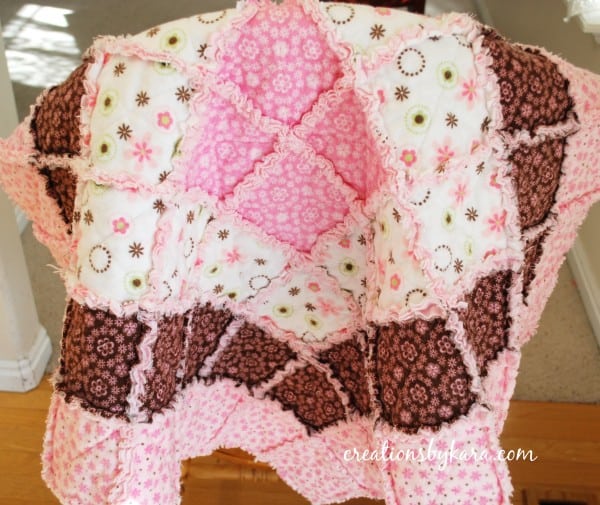


I do all my stitching making an X in the center and around the four sides. Then I clip it around all sides before sewing it all together. It makes the clipping go faster.
Thanks for the tip Debbie!
Can I make this using a 1/4” seam, I would like to have smaller fluff?
I don’t recommend it because you need to have room to snip the fabric without getting too close to the seam. If the seam is too small, it doesn’t ruffle at all, just looks like a rough edge.
Can I use fleece squares in center instead of the batting?
I think that would probably work.
Hi! I have made several of these with your tutorial and just love them! They make great baby gifts. Your tutorial is wonderful. One question. We now live in a very warm climate and I don’t want to add a layer of batting or middle flannel. Do I still need to make the “x” as I won’t be holding anything in place?
I’ve never done that, but I think you could skip that step and your blanket should turn out just fine. 🙂
I make them without the filler and I still sew the X. Helps hold together better.
Hey,
Is there a video available for the baby rag quilt tutorial? thanks
No, sorry, I didn’t make a video for it. I can bake, sew, paint, craft, crochet, and use power tools, but I still haven’t learned how to make a decent video. 🙂
Hello, I’m making a rag quilt for my granddaughter graduating gift. I would like to watch the tutorial but can’t open
Ok. I’m gonna be that one person that asks.
In one of the last images you have two brown squares on the very outside and pink on the second row and the rest of the quilt those two colors are swapped.
My OCD perfectionist brain is forcing me to ask why?
Sorry!
Haha. I actually sewed them in the wrong order accidentally. I was in a hurry to get my pictures taken, but after I was done, I unpicked the stitches and sewed them in the right place. No way I could have lived with it out of symmetry like that!
This is THE BEST tutorial I have ever seen on this! Simple and to the point. Thank you so much for sharing! I can’t wait to get started!
I am so happy that I found your directions. They have been very clear and this is my first attempt at any type of quilt! I have one question though. What kind of scissors are you using to snip the seams? I’m almost to that point and am nervous!
You can just use regular fabric scissors, but I think the spring loaded scissors are easier to work with for this project. I’ve linked to both types in the post so that you can see what kind I use. You can buy them online or at any fabric store. Good luck!
thank you for posting this tutorial. I am going to make this baby rag quilt for my new grandchild arriving in August. Just one question: why do we sew an “X” in the middle of each square? won’t it show up on the quilt and look ugly? just wanting to know as I see all instructions with this. thanks – have a wonderful weekend/
Congrats on your new grandbaby! Because the batting is cut smaller than the fabric squares, you sew an “X” to hold it in place. Without the X, the squares of batting could come loose and bunch up when the quilt is washed.
Any advice on sewing rows together. I keep having to do multiple attempts to get over the seams of the squares. This is my first sewing project and your directions are excellent! Thank you!
Sorry, I just saw this. It can be tricky to sew over the seams, just go slowly. But if you have to sew over them a few times, that’s totally fine.
I’m a beginner and can’t seem to find this answer. When sewing a rag quilt what kind of thread number is best to use? I’m planning on using flannel in the middle with fleece for backing. What thread and thread number would be best for the thickness?
Thank you for your help!!
I’ve been sewing for years, and although I’m not an expert, I’ve never heard of thread number. I use all-purpose thread for my quilts, but you can also use machine quilting thread. I included a link to my favorite thread in the post. Hope that helps!
Wonderful! Thanks for sharing. Found this on Pinterest
I’d like to make a Queen sized quilt, how much more fabric would I need?
Like I mentioned in the post, I am horrible at math, so I can’t give advice on the amount you would need. I always just ask the ladies at the fabric store. They are very helpful!
Thank you for this wonderful, clear tutorial. I saw a quilt like this and wanted to make one. Your instructions are wonderful.
Hi. I am planning on making a baby quilt. Can I use flannel in the center instead of batting. I want to use cotton fabric for the top and bottom but use 2 thin squares of flannel instead of batting. Will that work?
I’ve had several readers use a layer of flannel in the middle with great success. I think it should work just as well with two squares. Good luck!
Yes, that works good also!
Hi! I used your tutorial to make my first ever quilt for my first granddaughter and it was super helpful as I am just a beginner when it comes to quilting or sewing in general for that matter! I would like to make a queen size rag quilt made out of strips of material and don’t have a clue how much material to get or how big to cut the strips. Any help you could offer would be great.
Thanks,
Theresa
Hi,
I want to make a rag quilt out of my husband’s old AirForce uniforms. I am bit nervous about this as it’s my first time ever sewing something with a sewing machine. I have a question when it comes to using the pins and then sewing the pieces together: do I just run over the pins with the machine or will I do it right next to them? I am afraid to break something if I run the machine over the pins!
No, you don’t want to hit the pins with your sewing machine needle. It bends the pins and is bad for the needle. I usually do one of two things: pull the pins out as I get close to them, or use the knob on the side to sew so slowly that I can force the needle to go over the pins instead of hitting them. Hope that helps, and good luck. I love the idea of using your husband’s uniforms!
The small metal straight pins can easily be sewn over. The pins with the balls on the tips are thicker it seems and I’ve broken needles trying to sew over them.
Hi Kara,
I have a question about cutting the fringe. I’m confused when I get to the intersections. Do you cut a snip right next to the stitches or do you skip some space. In other words if I’m making a snip ever half inch, when I get close to where one block is sewn to the next do you skip over one whole inch before snipping again so there is a cut a half an inch on each side if the stitch line. Plus what about the four outer corners? Do you snip it so that a square falls off the corner tip? I hope yo7 can make sense of my question.
After you wash the quilt and it frays, it won’t make much of a difference. I tend to snip more rather than leaving a larger space, because I like more frayed edges. I do like to snip the corners and remove the square, but that is just a matter of preference. Good luck!
Just finished my second rag quilt using your tutorial. Love these quilts!! Thanks so much for an awesome tutorial for a beautiful quilt!
I love how simple this looks. I am going to make my next donated quilt for Blankets of Love Foundation for Mental. Thanks for sharing your talents
Hi I can’t see the fabric suggestions. Please post what you used. Thanks!!
The fabric that I used is sadly no longer made. 🙁
The best tutorial by far for making a rag quilt. Thank you so much for sharing!
Do you lose your stitches when sewing these
Thanks for your tutorial in rag quilt, I have just started making a quilt for my sons first child, I don’t know the sex yet so I’ve gone for yellow, and you have really helped me with these directions. But can I ask you how you decide on the colours to put together? X
I’m making this for a friend of mine. 1st timer!!!!! any how I’m using minky for the back and flannel for top and the same center as you advised. however i forgot to prewash the flannel before cutting!????? eeekkkkkk did i really mess up? i am making a larger blanket 8 yards total….. 5 patterns for top 25 square each at 5″. 125 squares of minky 5″ each . lol and the batting. so I’m in deep when it comes to cost and work. help………
Depending on the type of flannel you bought, it may shrink, it may be fine. If you haven’t sewn everything together, I’d was one square and run it through the dryer to see how much it shrinks. If it doesn’t shrink much, you’ll be fine. If it shrinks a lot, I’d wash all the others, then cut the other squares down to match the smaller size. Lots of work, but better than ending up with a quilt that bunches all together. Hope that helps, and good luck. I’m crossing my fingers your flannel is the type that doesn’t shrink much!
I love these Rag Quilts, I have been making them about 15 years, I have used regular fabric and the flannel. I think they make the most darling gifts for newborns and crib size. I used the fleece when I made twin size. I love your pattern’s you have done Kara. Thanks for sharing I love looking at others ideas. Thanks again for sharing and teaching us more.
Thanks so much Ginger! I agree, they make such darling gifts. 🙂
I’ve made several rag quilts always in flannel but I always use the same size centres as the fabric squares … why do you use smaller? Does it give a nicer effect?
If your whole blanket is flannel, it doesn’t matter. When I use the batting inside, I cut the pieces smaller so the batting doesn’t show up in the frayed edges. I think it gives a much nicer look.
I want to try this! Your instructions are the best. One question. Is fleece and flannel the same thing? Thanks Teresa
Thanks Teresa! No, fleece is actually much thicker than flannel.
AWESOME instructions thank YOU my 1st will be very very soon.
I just bought fleece, for front and back, to make a rag quilt. I was going to make it as a baby gift but I’m having second thoughts. What’s your opinion? Go for it or go with option B, an actual quilt? I’m sure she’ll love either, but qulaity matters and honesty appreciated. Thanks in advance
Hi Kara,
I’d also like to say thank you so much for such a wonderfully done tutorial. You helped me make my first rag/t-shirt quilt that belongs to my sister. Thanks again for your time.
Thanks so much for this great tutorial!!! Just made my first rag quilt and am in love! Appreciate your time and effort!
So glad to hear you finished your first quilt!! 🙂
Would I need to sew the X if I’m not using the batting in center?Also, other online tutorials suggest not washing the flannel prior to cutting and sewing. Have you had any experience with not washing it and how will it turn out?
I don’t wash my flannel first and no the x is to hold the batting in place. Are you using a piece of flannel in the middle instead? If so, that should be the same size as the top and back square. Only batting should be smaller. Also, when sewing the squares together I try to grab just the edge of the batting in ththe Sean it helps to keep it in place along with the x.
This is by far the best tutorial for a rag quilt I’ve seen! I’ve been reading tons of them too. This will be my first one and your tutorial is excellent! Thank you so much!
Thanks so much for creating this tutorial. I am a beginner and this is going to help me a lot.
I get that each side is 1 1/4 yards but if you use different colors like you did, then how much fabric of each color is required? assuming that I follow your exact pattern?
Noelia, I went out on the internet and found this for you. I needed the same information and I hope it helps.
look at the chart for Squares per yard. There are 64 squares in this quilt, so you can count each color differentiation and take total and plug into the chart on 5″ squares and the chart will tell you how much fabric you will need.
8 6 4
8 6 4
6 4 2
6 4 2
4
32 20 12
Using
40″ material outside color and inside four squares you will need 3/4 yards for the second color you will need 1/2 yard And for the inner third color you will need 3/16 yard. This is just over a yard and a half. If you find material that is 42 inches wide, you can cut it from a yard and a half.
EXCELLENT tutorial!
easy to read & understand
and the pictures helped a LOT!
Thanks so much Sheila!! I know pictures help me out when I’m trying something new. 🙂
Hi Kara, wanting to sew a rag quilt but do have a question.
After seems are sewed together, is it the flannel that frays? I do not believe it is batting included in the fraying because it was measured an inch smaller. Is my thinking accurate ? Thanks Jeanne
Yes, it is just the flannel fabric that frays, not the batting. 🙂
Hi Kara, Thanks for the baby rag quilt tutorial I am completely new to this but my question is: I want to use minky on bottom flannel in middle and cotton on top do I cut all three the same size? I want the finished blanket to be about 18×18 so how big do I cut my squares? I am new to this so I don’t know how to figure this out. But the sewing part of the tutorial I understand. Good instructions thank you. Please reply to me soon because I want to make this for school football season. Ga. Bulldog.
Thanks again I will post when I get it made. And how much fabric do I need to purchase?
Gail
Yes, you cut all the squares the same size. I mentioned in the post that I am the WORST at math, so I always have the ladies at the fabric store help me figure out how much fabric I need. 🙂
Would it be ok not to use a batting between the rag quilt I just want to use flannel squares front and back?
Yes, that should work just fine. I’ve never tried it, but I’ve had several readers leave out the batting, and it worked for them!
I’ve made several rag quilts for Baby and I
Did not use batting. The two flannel fabrics are thick enough, yet it can still be used for swaddling baby. Your quilts are adorable!!!!
Thanks so much Debbie! I’ve had other readers leave out the batting with great results as well, so that is definitely an option for a lighter weight quilt. 🙂
I use three layers of fabric on rag quilts, but do not use batting. This works very well.
That is a great option for a lighter weight quilt, thanks for sharing!
I love the color scheme for this quilt. My favorite quilts to make are rag quilts which I started making a couple of years ago, unfortunately, I had to figure it out myself. I really like your tutorial. As a suggestion, I use a sandwich of 100% cotton for my top layer, 100% flannel sheets (up cycled) for my middle layer and 100% cotton flannel for my bottom layer. Using three layers of fabric rather than a layer of batting gives the quilt more texture and less weight, as these can be VERY heavy quilts. By using the three layers of fabric, cut the same size, you have the option of hand quilting each square or machine quilting each square with a pattern other than an “X”. It also gives you the option of not quilting the squares at all.
I love the idea of using up-cycled flannel sheets for the middle layer! I think I’ll have to try that for my next quilt. Thanks for the idea!
What is upcycled flannel?
When you use the middle and bottom out of flannel sheets do you cut those in squares or do you leave them one piece thank you
Hi Kara,
My first grandchild, a boy, is due in May!!
I have made several full size quilts in the past but never a rag quilt.
I was looking for a project that I could make for our little “Tater” and ran across your tutorial. What a beautiful example you show and your step by step instructions were great. My daughter’s baby shower is in a week and I finished with the quilt this morning…Love it! Thanks once again for your site. If you would like a photo, just let me know where to send it.
Jeri
So glad to hear that you used my tutorial! I’d love to see a photo!
I just wanted to thank you so much for posting the baby quilt. I made a quilt for my son when he was a baby 48 years ago. I never made another one until last June when I saw yours. Since then I’ve made 13 more. Big ones, small ones, bound, rag, self-bound. I have amazed myself and have you to thank. So I thank you again!
Wow, that is awesome! 13 quilts is such an accomplishment! I am so very happy to hear that my tutorial got you back into quilting again. It just makes my whole day. 🙂
I just finished your quilt (apart from the snipping and washing). I found this tutorial to be amazing. I chose a quilting square I had (6.5″) and made it from there. It will be perfect for my friends baby shower, and It took less time than anticipated. This pattern was so simple it gave me the confidence to consider more pattern, or different stitching for the next one! Thanks so much!
I bet your friend was so thrilled with the quilt! Glad my tutorial was helpful. 🙂
Hi this looks like a great project. I was wondering if you thought using flannel on the rag side and cotton on the reverse would be ok?
I have some leftover 100% regular cotton that would make a nice backing. I don’t know if the difference in weight of the fabrics would make it awkward to sew and cause bunching. I love that there is no binding and the quilting is done as you go. Thanks
Dorothy
Yes, it works just fine with cotton on one side and flannel on the other! 🙂
Hi Just a couple comments!
I liked your pattern and made a very cute copy with different materials, I wish I could have could the same types but we seem to have limited prints for flannelette here (BC Canada)
If you plan on doing much quilting, trust me, your favourite thing will be your rotary cutters, and your walking foot for your sewing machine. Walking foot moves the fabric through much better with out bunching and stretching. Use mine for all kinds of things.
Happy 2016.. and Keep on quilting!
I agree about the rotary cutter- I love mine! I actually just purchased a walking foot and used it for the first time. So handy!
Thanks for the cute ideas.. # 1, a walking foot will be your new best friend if you do any more than 1 quilt, so much easier to feed the material through.
#2 I wish we had the beautiful colours of Flannelette that you seem to have where you live.. Jealous!
Wish I could post a picture of the baby quilt I made following your pattern.. so cute! Thanks a bunch!
Happy 2016 and keep on quilting!
Where did you find the flannel you used for this rag quilt ? Love the colors, I wanted to make same quilt, same colors. 🙁
I checked Hancock Fabric store today, No brown flannel but I did find a couple of pinks I could use. I will try Jo Ann’s to see what they have in flannel.
Thanks for the cute pattern idea, I made one for my newest great niece, it is very cute. She gets it this week end.
Thanks again.
Donna
Oops, I’ve just taken it out of the washing machine and noticed I’ve clipped all the seams apart from around the outside edge of the whole thing! Do you think it will be okay if I dry it then clip the outside edge then wash/dry again? I hope I haven’t ruined it after all that work! Thank you for the instructions 🙂
Oh dang! Luckily it’s just the outside seam. I’d just stitch over it to secure the seam, then you should be fine to wash and dry it again.
Oops, I’ve just taken it out of the washing machine and realised I’ve clipped every seam apart from around the outside edge of the whole thing. Do you think it will be okay if I put it through the dryer then do the remaining clipping then wash/dry again? I hope I haven’t ruined it!
I made this baby rag quilt today. Thank you so much for the instructions. I’d post a picture but I don’t see anyway to post one.
I’m not sure how to post pictures in comments, but you could share it on facebook or instagram. I’d love to see it! 🙂
Your tutorial was fabulous! I’ve made the cutest baby quilt ever! Where can I send you a picture? One problem, I accidentally snipped one of the tony squares in several places! What do I do? How can I fix this?! Thank you!
I love this tutorial! Thanks so much for it, I’m working on my first rag quilt now and am very excited. Thanks for the excellent instructions!
Good luck and have fun! Rag quilts are so easy to whip up they can be addicting. 🙂
Hi! Love your quilt and your extremely helpful instructions. I have made two rag quilts so far; both were auctioned at my children’s’ schools. The ne problem I keep running into is where the seems connect. (That may not make sense.) It’s like the intersections, or 4-way stops in the quilt. (Can you tell I am a novice?) I get so frustrated wondering what to snip. I see some of the rag quilt and their corners are beautiful and so congruent. I’d appreciate any tips you may have.
Thanks so very much!
Kim
Hi, this will be the first time I have ever made a rag quilt. I have always wanted to make on but never found the time. My question may be obvious and silly but you never did mention it in your instructions. Do I use a back stitch when sewing the X and when sewing the squares together? Need to know because I am going to start one tomorrow.
Please let me know soon.
Thanks,
Julie
You can backstitch, but it’s not totally necessary, because you will be sewing over the stitches when you do the side seams. I usually do it just out of habit. 🙂
Hi Kara, I have a few questions regarding rag quilts and came upon your blog with instructions so I thought maybe you could help. When you cut the batting smaller than your squares, you do not catch the batting in your seams. When I finish the quilt and wash it, the batting ends up shrinking and bunching up in the middle of each square. Each square has an area around the perimeter without batting and the middle of the square has the all the batting. Is this how they all turn out? The next time I made a rag quilt I decided to use a flannel for the batting and cut all the squares the same size in order to catch the batting. It seemed like each square puckered up and did not smooth out nicely after it was washed. Maybe I am being too type A about this or am I doing something wrong? Thanks for your help.
Nancy
Nancy, if you sew the “x” like in step #5, the batting will be secure and won’t bunch up. I like using warm and natural batting, because it stays in place much better than traditional batting. When you used the flannel, did you pre-wash it? That helps eliminate most of the puckering.
Why don’t you make the x only on the batting?
You need the corners to be free so that you can fray the edges all the way across. It makes for a much prettier finished product. 🙂
Nancy, I’ve made the fatal mistake of making a detailed project that required a lot of piecing. All the exterior fabric was made out of a military uniform that had been washed many times. The lining was new, stiff fabric that gave the project form. A little situation came up that required me to wash the project a couple days after finishing it. The lining shrunk A LOT! I had to carefully take it apart, buy new lining, washed the lining on hot to shrink it, then put it all back together. I knew I should prewash and normally do, but didn’t this time. I know some quilters like the puckers that shrunken fabric creates so they don’t prewash. Personally, I prewash and dry my fabrics in the same manner I will be cleaning it later which is typically cool water and low heat. I prewash to prevent most unfortunate surprises that result from funky shrinkage. I suggest prewashing on your next rag quilt to see if you like the ending results better. If the batting shrinks I would look into washing it too.
Hi there Kara, just a quick question – what if I wanted to use fleece on the backing but didn’t want to cut it and didn’t want to use batting would it still work or would I need to cut the fleece? Is wadding the same as batting? Many thanks
You can use fleece on the back, but you still have to cut it the same way. It won’t fray though. You can leave out the batting, the fleece would make it plenty thick. Sorry, but I don’t know what wadding is. Is it like fiberfill stuffing that comes in a bag? If so, it is not the same as batting. Hope that helps. 🙂
Hi, I can’t wait to make one! Your instructions are great. I’ve never done a quilt before, so my question might be silly. What about the back of the quilt? Do you sew it when you sew around the outside edge? Before cutting? After? I just want to put minky on the other side. I wouldn’t need batting right? Thanks.
For a rag quilt, you sew the front pieces to the back pieces one at a time. You don’t have to use batting if you don’t want to. Just follow the instructions, using squares of minky in place of the flannel pieces for the back.
Thanks, I see, and the seam has the fabric from front and back. Oh, and now I noticed your comment about the minky at the beginning. That makes sense. For my first I’ll use flannel. Your instructions are great, thanks.
I AM CONFUSE AT THE PART WHERE YOU PIN IT IN THE MIDDLE AND THAN SEW DOWN THE SIDE???? HELP ME PLEASE
I’m not sure what step you are referring to. What number are you at?
Thai you for such easy to follow steps . WOW!!!!
Hi Kara! I looked through all the comments but didn’t seem to come across mine- is there a specific foot to use for the machine that works the best? I’m finding that I’m struggling with keeping the squares as squares when putting the x’s in them in the beginning, even with multiple pins and was wondering if maybe a different foot is my answer. I’m finding myself being the Queen seam ripper!
Thanks!
I just used my regular foot. If you’re having trouble, try using a longer stitch length. Hopefully that will do the trick!
Was wondering if this might work with Tshirts? I’m thinking the edges would “roll” instead of fray. What do you think?
Marcia, I agree with you, I think they would have a tendency to roll rather than fray. I use old t-shirts for rags, and they never fray, even after being washed dozens of times.
You really should use a ‘walking foot’ if you are going to use batting, otherwise the flannel will slip.
I made two of these quilts and I did use a walking foot. Works great and keeps the layers together so there’s no slipping of the flannel and batting.
I am just curious is it really necessary to cut the batting 1 inch smaller, is there a particular reason. Don’t get me wrong when you sew the material with 1/4 inch seam the batting will not have any stitch on it and if you stitch it 1inch on the sides of the material then the finished product will be 4″ square. Hope you reply.
There are two reasons you want to cut the batting smaller. First of all, it makes the seams to bulky. But the most important reason is that you don’t want it to show in your ragged edges. It doesn’t fray, so it looks ugly to have batting showing. And after all that work, you don’t want to end up with an ugly quilt! 🙂
Thanks Kara I see what you mean appreciate your reply.
No problem. Good luck with your quilt! 🙂
I’m just wondering how you make a perfect “X” stitch, do you use a guide, or just wing it?? These rag quilts are awesome. I’m first making a baby one, then one for our king size bed!! A quilt shop close by uses (instead of batting) osnasburg for their lining. Have you ever heard of that? Pros/cons??
I just wing it. 🙂 I’ve never heard of using osnasburg instead of batting, so I can’t help you there.
Would like to know the name of your material that you used for the rag baby quilt. Stephanie and I like the pink, brown look. Thanks
If I wanted to use Minky fabric on the back would I need to have two layers of fabric with batting in between and stitch them together THEN attach the Minky to the back?
No, you can just use the Minky like regular fabric. It doesn’t fray, but it does turn out super soft. 🙂
hi could I put a binding around the quilt to finish it and if so do I put it on before or after I wash it. Thank you jane lambert
You could put a binding around it, but that kind of defeats the purpose of having a rag quilt, because you’d be covering up the cute frayed edges. But if you prefer that look, definitely add it before you wash the quilt. Good luck! 🙂
hi I was just wondering if I could put a binding around the edges and if so do I do it after I have washed the quilt. I hope to hear from you soon, Love Jane lambert
Hi Kara…I’m so happy that I came across your blog. Years back I sewed a lot, but with my busy home and work schedule, I somehow put that on the back burner.
Recently I have gotten the “itch.” and while my mother is a very active quilter, she introduced me to a amazing quilt store in northern Indiana that has beautiful quilts and fabric displayed. While there I came across a rag quilt and fell in love. This is what led me to search for instructions to making one myself. I will let you know how it goes and thank you again for such great instructions and advice.
I LOVED your tutorial, so easy and clear to follow. I’ve posted my finished quilt on my blog, and linked back to you!
Such beautiful pink colours – just pretty for a baby! Neatly explained and photos add to information. Thanks. I too love to quilt, its so therapeutic. Look up my creations and travel narratives, if you wish
Oh my gosh Kara……when I found this pattern and saw you beautiful rag quilt I packed my grandson up and ran not walk but ran…..my way to Joann’s Fabric took you pattern with me and pick out very similar fabrics to make my first rag quilt on my very very new Viking machine. I’ve been quilting now for about two years and I owe all my training to Ms. Terri Hunt!!! When I’m done with the quilt I’m going to show my lovely teach and friend what YOU’VE taught me !!!!!!!
Thank You So Much Kara :)))))))
Gail ~
First quilt I have ever made. It turned out great. Thanks so much for the excellent directions and pictures.
I am making this right now!! I just started cutting my squares last night. I hope I can finish at least those tonight!! This is a very well executed tutorial, being that I’ve never made a quilt before I think I’ll be successful. Just gotta make sure all my squares are right. I’m making one for a friend in lime green and fuschia and a gender neutral one for my sister in gray, yellow and I originally had teal but I’m going to get something greener as i don’t feel the teal is that gender neutral. Can’t wait to finish it.
Thank you sooooooo much for your very helpful step by step instructions. Your blog was instrumental in making my first quilt for my best friend’s baby. I loved the way it turned out and she did too. Thanks, Kara!
I am so glad to hear it Daisha! Thanks for the kind words. 🙂
Love the tutorial ! Very easy to follow. I am having difficulty keeping the
material from bunching when I sew the second line of the X on the square.
I can’t remember the last time I used my seam ripper more. Any suggestions?
I never had that problem, so I’m not sure what’s causing it. I would try lengthening the stitch, that helps me when I have bunching issues on other projects. Good luck!
Just wondering…when you are sewing the X on each square, why don’t you sew all the way to the corners? Thanks!
Hello there Ms. Kara:
Here is my attempt at your Baby Rag Quilt.
Thank you SEW MUCH for sharing these instructions with the world. I could not have done it without YOU.
Cheers,
Lyric
When you sew the X do you change thread color when sewing a dark square & do you use a different color in the bobbin if back is all one color?
Being your quilt, do you; I’d say. Who is to say you are wrong for what YOU decide for YOUR quilt?
For what it’s worth, I chose to do different bobbin than top threads because I love colour.
Let us know what you decide.
Cheers,
Lyric
Hi Kara,
Your quilt is adorable and your blog is very nicely done. I just wanted to be clear, are your seams really 1/2″ or are they 1/4″? I’ve made this type of quilt before and used 1/4″ so I just wanted to see if you used larger seams because the finished quilt is so cute!
I noticed that in the photo (step 14) your blocks are out of order. Were you able to fix this before you washed it or did you fix it after? Because I see in other photos it’s been corrected?
Thank you again because your fabric choice really is precious.
I did a rag quilt for my sons with their old blue jeans and some cotton material with wv scenes, the denim frays really well!
Hello, Kara,
I just love your tutorial, and your quilt is so beautiful! I am a grandma of nine (soon to be ten!), and have never made a quilt of any kind. I saved some flannel fabric from when I made my two babies/toddlers shirts, pj’s, and nightgowns when they were very young. Now I am making their own babies quilts out of those remnants. (I’m so glad I saved them because they will make the quilts very special!) This looks like such a fun project and will work perfectly for me. Your tutorial is so wonderful! Thank you so much for it! God bless you and your family! Hugs, Carrie
I am attempting to make a similar queen size quilt out of denim squares, which have already cut out. It is at this point that I have questions and concerns. I would like to make the quilt/blanket with a solid back and just hand tie it at the intersections, leaving it with a frayed edge. My first question concerns the back itself… Should I use flannel or cotton? Regardless of which I use, can I back it in one large piece, such as with a king size sheet? If I do use a sheet (cotton or flannel) for my backing, can I go ahead and just trim it to the finished size, sew around the border, and let the edges fray? Or should I use a self binding method and bind my edges with the backing material? If I choose to go with cotton for my backing, should I add a piece of flannel instead of batting to add thickness in the center? I don’t really want to feel the seams from the backside but since I live in a very mild climate, I had pretty much decided not to use any batting at all so this quilt/blanket would be usable year round. Do you have any other thoughts or suggestions that might help out? As you can probably tell, I am VERY new to this but I am determined, come hell or high water, to finish this project…
Greetings, Ms. Kara:
I found this via Pinterest (gotta love the big “P”) and I am sew glad that I did. New granny on the way this June and one has her name written all over it. Been mulling over names for the quilt. Keep coming up with “Gramma Loves YOU”.
Thank you for sharing this. Love the colors you chose and though it is now years since you posted this I hope adopting turned out to be everything that you desired.
Namaste,
Lyric
I am wondering about the backing? I didn’t see where you put it on. I only saw the the front and the batting when do you add the backing. I was going to use one solid piece? Help? ?
Dawn, see step #4. 🙂
Hi Becca, your instructions cleared up a bunch of questions I had, thanks!!! One last quick question on the rag quilt, what did you do with the edges, did you snip them like you did the middle seams, or do you put a binding on them?? What have you tried and what looks best??
My wife showed this to me and being upcoming grandparents we found the materials and followed your detailed instructions and found it to be a very humbling experience completing this together. Grandpa did the cutting and had a few troubles getting the colors right as their were lots of thinking to put it together right. Gramma did the sewing and as soon as we finish the cutting and cold wash delicate cycle and dry we would like to post the picture if you find others may like what gramma came up with.. Thank you for your expert help and we hope Loya will enjoy for years to come.. The most fun was figuring out how the sewing machine works! Bless you for your Tutorial….
I think it is awesome that you made the quilt together! What a treasure for your new grandbaby! Congrats by the way. 🙂
Oh thank you very mutch ! It’s very easy the tuto….l will try …
Hi Kara:
I have a grandbaby on the way, due in June, and I can’t WAIT to make him/her a quilt. THIS will be my go-to quilt style! Thank you for sharing this tut. Yes, you did indeed make it easy for a person like me.
I’m excited.
Cheers,
Lyric
What needle and thread did you use? Thanks
And did you use a walking foot?
I just used one of the standard needles that came with my machine, and cotton/poly thread.
Kara, So excited to see this post. I promised Stephanie a quilt for her wedding, and the time just slipped away. Had a friend show me how to make one, but I love seeing the step by step visual! This is awesome. Thanks so much!!
Cyd (mom of the Six Sisters)
thank you…, I finally found great web site.
About to start this and put my flannel in the wash. I have a light blue, vibrant light green, yellow, fuchsia and patterned pink. Can I put these in together? Should I wash on warm or cold? Gentle cycle? Any wash additives? Do you cut off the salvages first or do any clipping to prevent long tangles of fray?
Amy~ As long as none of the colors are really dark, I think you’ll be fine. (If the fuchsia is dark, I’d wash it separately.) I’d try it first with cold water on the gentle cycle just to be safe. I never do any clipping first, I just cut off the long tangled fray after it comes out of the dryer.
Your color combination sounds awesome by the way! Good luck. 🙂
Just wondering what the best machine setting is best to stop puckering in the flannel
I usually set mine at about 3 (4 being the longest), but every machine is different. I’d just try gradually increasing the stitch length till you find one that works. If that doesn’t help, it may be a thread tension problem. I have a bugger of a time adjusting tension, so hopefully you can get it to work by just adjusting the length. Good luck!
I’ve made many rag quilts. I use cotton fabrics on the front and back and flannel for the middle. I cut all 3 layers the same size. The flannel layer cut the same size adds a bit of color and framing. Like a predominantly green Christmas theme with red flannel really shows up nice. Cotton fabric will fray nicely also. Use a little basting spray when putting together the layers helps keep them together. I’ve made lots of Christmas lap quilts, a fall harvest one, baby ones. Made a queen size fall themed one for my bed. I like the flannel middle because it is less heavy than batting (I’m in the South), while still warm. When washing a large one, I will use a med sized food strainer to “dip” the threads out while in the washer. This keeps too many loose threads from clogging up the drains. Also be sure and give the quilt a good shaking outside before and after washing.
I like the idea of using flannel instead of batting for a lighter quilt. I still need to give that a try!
Thank you so much Kara. This is the most easiest I have come across. My goodness, according to your instructions there is nothing to making a rag quilt. This is much appreciated. I have only recently started making quilts and so wanted to know how to do a rag quilt. Thank you once again.
Thanks so much Kathleen! It’s always nice to hear that someone loves one of my tutorials! 🙂
I love the colors that you used in your quilt. I started making rag quilts to donate to the local NICU where mu daughter stayed when she was born. My way of giving back. 🙂 You can check us out if you want to!!
I’m making my first rag quilt using your tutorial – and I’m loving it! I haven’t done any quilting for about 4 years, but took everything out just recently. My oldest son and his wife are expecting (their first, our first grandchild) and of course I had to make a quilt for the baby! It’s so nice, I might make some full-size quilts. I really like your tutorial – makes it really easy to understand. Thanks!
Congrats on your first grandchild! I’d say that’s a great reason to pull out all your fabric and supplies! 🙂
I just finished my very first rag quilt for my soon to be born nephew (thanks to your tutorial) and at first I was thinking “Oh Man…this is gonna turn out horrible!!” =/ but as it started coming together it was looking better and better and in the end it turned out fabulous!!! Now I have two more babies coming into the family, so I get to make two more quilts!!!! YAY!!!! And I have teenage daughters who want quilts and they have friends who are asking me to make them quilts as well. I know what Im making for Christmas gifts!! Anyway, your instructions were great, to the point and easy to follow. Thanks for sharing this great idea!!!
Yay! Glad to hear it Dawn. Good thing there’s a few months till Christmas, it sounds like you’re going to be busy!
YOU know how to give perfect, concise instructions. This is how to give an excellent tutorial regardless of what is being created.
Beautiful quilt too!
Great directions and also easy to follow! I’m making a rag quilt for my great-grandson. Hope it turns out as well as yours did.
Thanks for your input.
Love your tutorial. I made a small sample before committing to a larger one and it turned out great, but I do have one question. The ends of the frayed edges continue to unravel after several washings. the little threads on each “slice” for lack of a better word continoe to unravel and I’m concerned that this might be a problem for an infant. It would eventually wind up in his mouth I suspect and I wonder if those little tiny threads would be an issue for my daughter. Any ideas? Thanks so much
Hi Kara, love the tutorial! Can’t wait to make it. I just have one question that is bothering the heck out of me! I want to make one exactly like yours with the same dimensions. However, how is this blanket a 32X32 in if it has 8 squares on each side that are each 5″? Wouldn’t that make a 40X40″? Maybe i’m just being dumb, but I don’ get it. Thanks!
~Courtney
When you leave a 1/2″ seam allowance on each side it makes the finished size of each square 4″.
When you leave a 1/2″ seam allowance on each side it makes the finished size of each square 4″.
Great, easy tutorial! Love it! I can’t wait for that next grandbaby so I can put it to use! Congratulations on the arrival of your baby girl! What an awesome blessing! My question is this: Do you wash your flannel once before cutting out your pieces etc? For most quilts it’s recommended that we wash our fabric first and press and starch it…thus my question.
Thanks for inspring me to do a baby rag quilt. I will be subscribing to your blog.
Linda
Yes, I pre-wash and dry my fabric to prevent uneven shrinking.
My husband and I have made several rag quilts. He embroiders on one side and I do a design on the other. We use flannel in the middle with cotton on the outside, so they are warm and not heavy. We use a good quality muslin on the back, and have given them as wedding gifts, birthday gifts, get well gifts, so that friends and family can sign them as a keep sake. Always a huge hit!
I love the idea of having people sign them! What an awesome gift idea that will be treasured forever. Thanks for sharing! 🙂
When you wash the flannel, do you wash on gentle cycle or regular cycle? I just washed mine and it don’t look like its doing right at all. Thanks!
I washed mine on the regular cycle, but I know that some of the cheaper brands of flannel can have issues with pilling.
IM SO EXCITED TO FIND YOUR SITE….IVE BEEN WANTING TO LEARN TO QUILT, AND THIS IS GONNA BE THE PERFECT START…..THANK YOU SO MUCH…..ILL LET YOU KNOW HOW IT GOES….:)
This was SO easy to follow, especially as I’ve never made a quilt before. My mother in law, an avid quilter, gave me some super cute 5″ flannel squares. In my searching for patterns, yours is the quilt that made me stop here & say “this is it!” So, here’s my first attempt – it was SO fun and am giddy on how well it turned out!
Kara, I found this other site that had some “math” to help see how much fabric you need for a rag quilt. I think it would help some! Thanks for a great tutorial!
scroll down for measurements:
Thanks for the tip Lynda!
Hi Kara!
I want to try to make a rag quilt for a baby shower in a few weeks. Just one question, do you pre-wash the flannel?
Thanks for all of your advice, I can’t wait to make this!
Yep, I pre-wash the flannel.
So my sister tried to make this quilt for me… I gave her this site cause she is really good at this stuff. Unfortunatley she disregaured my wants for the blanket pattern and the fabrics I wanted. I have a son and because of health reasons he is going to be my only child. So I wanted a rag quilt made out of all his recieving blankets. Anyways. She didn’t use them all. I told I didn’t care how big or small the blanket was as long as they were ALL in there. And I wanted a random pattern. So she put the blanket together, didn’t use batting, and didn’t stitch the x’s in the squares. Is this fixable? Or is there no hope and all my sons blankets are ruined :/
It’s fine that she didn’t use batting, I know lots of people leave it out because they want a lighter weight blanket. Sewing the X holds the batting in place and makes it so the outside squares don’t slip around when you stitch it together. But if she skipped that step, it probably made it more tricky to sew together, but it shouldn’t affect the final quilt. Does it seem to be holding together well?
If you have extra receiving blankets you want to use up, you could make up a few Rag Quilt Baby Bibs. Here’s the link to the instructions: https://www.creationsbykara.com/2010/08/rag-quilt-baby-bib-tutorial.html
Good luck!
I am very new at the sewing world and especially quilting but I really want to make one of these for my baby boy #2. I am having trouble finding a theme because everything fits my first boy and really just want to go with a color theme. My thoughts are using the same layout as your quilt but use Blue minky on the outside border (and the four squares on the inside) black and white dots fleecel on the next inner border and then a white fleece. I hope you can picture what Im talking about lol! My question is how much of EACH fabric should i order? And i have also heard you dont have to see batting if you are using fleece fabric.. I dont want a heavy blanket…. And i saw you mentioned about the minky material not fraying but i love the look it… if i use a fleece or flannel or even a cotton fabric on the back do you think it will be ok since most of my blanket will be minky. I dont want it to look sloppy since this is my first time. (i heard this style of quilt is very forgiving as far as straight line sewing) Thank you for any help you can over!!
thank you for any help you can offer! ^
I wouldn’t recommend using both minky and fleece for a rag quilt. Neither one of those fabrics will fray, so the seams will look a little odd and unfinished. If you use flannel in place of the fleece on the front, then the minky seams won’t stand out as much. Hope that helps!
As far as how much to order, that is a math question, and like I mentioned on the post, I stink at math!. I just ask the ladies at the fabric store to help me because I can’t figure it out. 😉
Yay!! I {loved} this tutorial so much that I set out to make my own {copycat} rag quilt & just finished it this morning!! I’m new to sewing & had never attempted anything like this before…I am THRILLED with how it turned out! I almost hate to part with it at tomorrow at a friend’s baby shower! ;). Thank you again SO much!!
Yay, that just makes my day! I bet your friend is going to adore it!
Just curious as to what the approxiamate cost of making a rag quilt is? Would like to make this for a good friend, but don’t want to make one if it’s crazy expensive!
Thanks!
Kristy 🙂
Kristy, it totally depends on the cost of your flannel. I’ve seen some for as little as $2/yard, and some for more than $15/yard. It’s totally up to you!
I usually backstitch mine just to be extra safe, but Raven is right, it’s not totally necessary.
No you don’t – you will be sewing up all around each square when you join them in rows.
I have made a total of four flannel rag quilts for babies. When it is ready to be washed, I take it to the laundromat to use their machines! This saves me from having all those threads in my washer or dryer! I take it outside and give it a good shaking before I put it in the dryer. My next rag quilt will be a memory quilt – made from jeans worn by my friend’s late brother. I’m making it for their mom and I’ve been practicing with the baby quilts…
Using the laundromat is a great idea!
So nice of you to make a memory quilt for your friend. I’m sure it will be a gift that they will treasure forever.
Thank you for your detailed tutorial especially the tip about how to quilt the x. Now I know why my points on the back side of the quilt didn’t connect. Thanks from a beginning quilter.
Glad it was helpful for you Carlyn!
Thank you for your detailed tutorial especially the tip about how to quilt the x. From a beginning quilter…
This is the first quilt I’ve ever made, and really the first thing I’ve sewn since Home Economics like 15 years ago. After reading the manual of my borrowed machine, and finding fabric in my late grandmother’s stash, I made a quilt for my brand-new nephew. It turned out great, except the flannel I used for the back pilled quite a bit, and a couple of the seams ripped in the wash. I think I can blame that on delicate/old flannel fabric. I tried to fix it the best I could, and I guess I’m satisfied with the result! I can’t wait to give it to my brother. The history in the fabric and the hand-made-ness will surely make a great gift 🙂
I wanna see a picture of the back!
I was wondering if I could use regular quilting cotton fabric to make this blanket or just use fannel material . This is going to be my first blanket to make…
Kara: Thanks so much for these wonderful directions. Do you think you can answer my following question? It’s regarding the post from Melissa, I was wondering about her rag quilt using tshirts and denim. I’m thinking the tshirts won’t fray. Is one layer of denim enough for the frayed look or did you attach the t-shirts to a piece of flannel, cotton or denim. Thanks.
I haven’t tried a rag quilt with denim or t-shirts, so I’m not sure. Hopefully we will hear from Melissa!
When you wash the rag quilt, does it matter which laundry soap to use. Is Tide ok or should you use dreft or do you need to use any soap the first time you wash the rag quilt?
You can use whatever laundry soap you like. 🙂
I found your instructions the easiest , and you had great pictures . My blue rag quilt turned out great .I made it for my niece who is having a boy in Jan . I know she will love it . Thanks so much
I found your instructions the easiest , and you had great pictures . My blue rag quilt turned out great .I made it for my niece who is having a boy in dec . I know she will love it . Thanks so much
I’am making a rag quilt with fleece without batting. When I sew the rows together the material is too thick to go under the sewing machine pressure foot. Short of taking appart all the sandwiches, what do you suggest?
i love this quilt i made one for my daughter years ago but for the squares i used all the clothes she out grew it took a few years but we made it the size of a twin bed and when she had her first show and tell in kindergarten she brought it cause she was so proud
Such a fun idea to use her clothes. I bet she will treasure it forever!
I love this tutorial. I really can’t buy any new fabrics but I do have a bunch of flannel shirts that are waiting to be cut up so I’m going to try that first. On another note, I think it is wonderful that you have adopted a child. I found out last year, in my mid thirties, when my father unexpectedly passed away, that I was adopted. All I can think about now is what a great life my (adoptive) mom and dad gave to me and what a great sacrifice my biological parent made. So thank you. And now I have to get to cutting up these flannel shirts!!
Thank you for explaining how to make a ragquilt. I was always wondering how to make this. Your explanation was very clear. I will try this as soon as possible.
It works very quickly. You dont have to quilt it afterwards.
Thanks again.
Grtz. Rita from the Netherlands.
Just started crafting and saw this. I believe I can do this. Started cutting today can’t wait to start sewing. Thanks for the tutorial.
Thank goodness for this tutorial! I have been searching for detailed pictures of Rag Quilt making and I finally found your site. The instructions I was given were not as detailed as yours, and although being pretty crafty, I was left with questions after reading them several times. You made it so easy to understand…Now–to work on my rag quilt!
Thank u so much. I made my first rag blanket and its beautiful! This one is for my g baby thats due in Feb. Now on to make one for my 2 yr old g baby. Your instructions were AWSOME!! Thanks :))
Use a walking foot when you are sewing all material together works real well does not bunch up
Thanks for sharing. Your instructions and photos are great. My sister and I are going to try our hand at a “rag” quilt at Thanksgiving, using your method. We’ll let you know how it turns out.
Thank you so much for the tutorial. You were great with the instructions. I am unable to read patterns which is why I need a tutorial and yours was fantastic. Thank you so much for making it look so easy. I am about to start a baby rag quilt as soon as I can get the Hancock’s and get my material. Thanks again for such an amazing tutorial.
Kara, our daughter is expecting our 2nd grandchild in about 2 months. I make teddybears usually-Memory Bears mostly, from clothing/material from loved ones who have passed away. I LOVE it! I’ve decided to take the plunge and try making a rag quilt-actually 2, one for a boy and one for a girl, as she doesn’t know what she’s having. I can’t wait to try this out. You’re instructions I believe the BEST I’ve seen after researching it! Thanks so much for sharing your talent:) I can’t wait to get the time to do them. I have a few teddybear orders to do first LOL! Just wanted to say thanks. I LOVE the colors in the quilt pictured…can’t wait to try it:)
Hi, I am looking at trying my first quilt and just love your tutorial… My question is (hopefully you didn’t already answer this some where above) how much of each fabric did you use? I know you said about 2 1/2 yards in total but what about each separate amount?
Kally,
The amount of each fabric you need depends on the pattern you choose. I used scraps of fabric for some of my squares, so I’m not even sure how much I used. Sorry I’m not much help. 🙁
Oh! Never mind! I didn’t account for the seam 😛 I have been so confused trying to figure out the measurements then I was like oh wow woman.
Haha, I totally understand. The math part of sewing is always the biggest challenge for me! 🙂
Wouldn’t 8 squares 5″ each make it 40×40″????
This is a fabulous tutorial! I’ve been reading through several and even watching a few videos and yours is the most detailed. I’ve been wondering how a rag quilt would be if I used a fabric other than cotton and your blog is the only one I’ve found that addressed that question. Thank you very much!!!
I find that instead of using batting, I use 3 layers of flannel with the middle layer being a solid. I cut all the squares the same size, pin together and sew without making the line down the middle. Then I proceed to cut and then fray. It makes the seams extra fluffy and saves a step since the squares are all sewn as part of the seam.
just be careful with your little bundle of adopted joy, that you don’t spoil them to the point that they are narcisstic monsters when they are adults……. my son married a girl adopted from Korea whose parents lavished her and spoiled her. If she doesn’t get her way or if I don’t call and “check” on her 2-3 times a week, she thinks I don’t care. I made a baby quilt for my grandson and she burned it because she was mad at me for something she wrongly assumed. Sorry to post this….. but I just want you parents to be careful. It’s so hard not to overspoil your precious babies. And children need to be loved and spoiled to a certian degree….. just be sure to groom them to be loving adults. And by the way….. I love this precious baby quilt! Thank you for posting the tutorial!
I love this quilt. I just bought my fabric tonight and can’t wait to get started. Going to be making the quilt for a friend’s baby.
Congrats on adopting your daughter. =) I was adopted as a baby and so thankful for the amazing life my parents have given me. I love getting to hear of other people’s adoption stories.
If i wanted to make this as a throw for an adult, what size do you suggest? How many yard of fabric would you suggest?
Sorry, math is NOT my strong suit, so I’m not much help. When I am making a blanket or quilt, I just ask the ladies at the fabric store for help figuring out how much I will need. 😉
I will be a first time grandma. I want to make the blanket, but I have a question, did you use felt in between the flanel or use real quilting batting, It looks like felt. I want to start as soon as possible, it is a beautiful piece, congradulation.
Diane D Arseneau
LOVE this tutorial, can’t wait to try it out! We recently had quadruplets, and the two baby girls took over our 3 year olds nursery, and I am about to make everything for her new big girl room, she’s so excited! I’m thinking of using designer cotton fabric on both sides and flannel as batting. I was thinking of not cutting the flannel smaller than the cotton squares, that way the middle flannel layer could help fray and fluff up the fraying. Do you think that would work or am I missing something?
I read the post from Janelle, post #102, she was asking about online places to purchase fabric. I just wanted to mention that I have ordered fabric fabric.com and I have been 100% satisfied with everything I’ve bought from them. I’ve bought ALOT of flannel and it is great fabric. Just wanted to pass that on in case anyone else needed a fabric source. And I also love your tutorial. Excellent instructions.
Hello Kara,
I dont have a clothes dryer- what would you recommend i do to get it dry and fluffy.
I love you quilt it is adorable.
Thank you for sharing.
I tried this today and my quilt came out perfect! I made it for my daughter that I am adopting from Foster Care. Love hearing other people’s adoption stories!
I have cotton fabric I wanted to use. I’m wondering after i cut all the edges how do I keep the fabric from fraying?
Um, actually, with a rag quilt, the purpose is to have the edges fray. 🙂
What kind of batting do you use? What should I ask for at the store?
Thanks for the super easy to understand tutorial!
I use warm and natural batting.
I am looking so forward to trying to make this quilt. Thank you so much for informative tutorial. Just one question. Not sure if my machine will be able to handle the thickness of the layers. Do you use a special foot on your machine?
Nope, just the regular foot works just fine. Good luck!
I was also wondering if a walking foot would make the sewing easier? Thank you for the clear and accurate tutorial. I was seen others on rag quilts, but bt far yours is the best!
I didn’t use a walking foot for mine, and I didn’t have any trouble sewing it. But you could certainly try! And I’m glad you find my tutorial so helpful. Thanks for the kind words!! 🙂
Hi, beautiful blanket and pattern. I have a couple questions, I apologize if they have already been asked but 156 comments was a lot to read through. You said 2 1/2 yards total. If I want to do a pattern like yours how much of the pink, how much of brown, how much for the back, and how much of batting? Thanks so much.
I also want to add that I was adopted and I am so thankful to God every single day for the life and opportunities I was given and its a wonderful thing you did adopting a baby. Congratulations. (She’s probably 2 year old now)
Madebyniki.blogspot.com
ive been rag quilting for some time now and i’ts always been a struggle to come up with cute flannel prints.you may have mentioned somewhere before but i probably missed it.i live close to seattle and we have a joann’s and walmart has fabric but im limited to that,just wondering where you go to buy fabric and if you can recommend any online stores.im a big fan by the way,thank you.
Hi Janelle,
I bought the fabric at Joann’s, but they stopped selling it. I was able to find more at a local quilt shop, but they sold out as well. I recommend looking for a quilt shop, I bet there are several in Seattle. The flannel is generally more expensive, but it is a much higher quality than I have found at Walmart. Plus they usually have a much larger selection of cute flannel prints. I don’t buy much fabric online, but I have purchased some from theribbonretreat.com and have been very happy with it. Good luck!
I absolutely love how simple and straightforward you’ve made this tutorial. I can’t wait to make one for my son and daughter! Congratulations on your daughter’s homecoming!
Thanks Casandra! And good luck with your quilts! 🙂
Do I need to stitch an ” X” to make the “sandwich” or can I stitch something else?
The “x” just seems to work the best because it holds the corners and the center together. You could stitch something else, you just might need to use more pins to hold the corners together when you sew the squares together. Let me know how it works! 🙂
Found the tutorial today and loved it. Will try for a larger size though as my kids are a little older. I too am an adopted mother and wish you all the best in your journey.
Thanks Jane!
Thanks for the great tips & step-by-step pics! I went with a more random pattern, but I love how yours came out! 🙂 I also linked to your tutorial in my post loveandstories.wordpress.com/2012/07/03/a-rag-quilt-lessons-in-potty-training/
This is an adorable rag quilt. I’m a more experienced quilter, have worked at a quilt store for 10yrs., and have made several rag quilts. But today, when I was prepping my fabric I needed a quick refresher on making a baby size. I found your tutorial and it is so well done-very easy to follow for anyone no matter what their experience level. Thanks for the time you put into it 🙂
Thanks so much Kim. I actually find myself referring back to my old tutorials all the time. The ole’ noggin just can’t remember everything anymore. 🙂
Hi Kara – I was noticing in your posts you guys went through the process of adoption and were blessed with you little princess in April. So happy for you. My daughter has a condition called Turner Syndrome. She is almost 13 now. TS only effects females. Because girls who have TS do not produce eggs and many have heart conditions that could compromise their lives if they carried a pregnancy using another woman’s eggs, our daughter plans to adopt. Interestingly I have worked in labor and delivery for 7 years. When I am introduced to a birth mother who is giving her baby up for adoption, I thank them and tell them how selfless they are, that they are a true hero. I pray everyday our daughter will be blessed to have someone as selfless and loving as they are give her the gift to become a mother. Congratulations to you. Cherish every moment of cuddle time with your princess.
So sorry about your daughter, but so glad that adoption is such a beautiful way to build a family. I totally agree that birth mothers are heroes. I am so, so, grateful to ours. Rachel has blessed our family more than I can even express. 🙂
Can you use courdoroy?
I have never sewn with corduroy, so I have no idea how it frays. I’d try cutting slits on a piece of scrap corduroy, then washing and drying it to see how it turns out. If it looks fine to you, then go ahead and use it. 🙂
I love this quilt so much! I am going to start making a patriotic rag quilt for a wife in my husbands Marine squadron. I was wondering what kind of “batting” you used between the front and the back? Is is just a neutral flannel or an actual batting? Thanks so much 🙂
I used warm and natural batting. You can find it at just about any fabric store. Good luck!
Thank you so much for sharing. My mother use to be a professional wedding dress maker and I have never had an interest in sewing. Actually, I am quite intimidated by the sewing machine. My friend is having her first baby and I am so excited to make her a rag quilt. I will share when completed.
This is a great project for a newbie, I bet yours will turn out just great. Can’t wait to see it!
Beautiful quilt, and wonderful tutorial! Have you done a rag quilt with an added edging that is then clipped? I am in the process of making a denim rag quilt with flannel back (large adult size). Thank you so much for sharing.
I have never tried that. If you make one, I’d love to see it!
I chose this as my first quilt project and it turned out great! Thanks so much for the awesome tutorial! I’d love to share a pic but don’t know how.
Thanks again, Jill
Yay, so glad to hear it turned out, especially since it was your first! Totally understand about not being able to share a pic. Technology can be so difficult sometimes!
Awesome instructions!! That really is such a cute blanket! Thank you!
Thanks so much Lora!
I just made a rag quilt out of a cotton blue, yellow and white duck pattern shower curtain. It is adorable! I bought it at Goodwill for $3 – washed it up and started cutting. I added flannel – for $10 and my time, I had it done in an afternoon. It’s for my brother who’s baby is due in July!
It sounds adorable! And when you can get something for such a great deal, it’s even better! 🙂
This quilt is so adorable! Could you please tell me how far apart you clip the seems?
I totally love your quilt tutorial. But, I was wondering if flannel in the middle could be used instead of batting?
Yes Jen, you could use flannel in the middle instead of batting. You’ll end up with a lighter weight quilt, but it should work just fine. Good luck!
This is so cute! The step by step instruction is very easy to understand! So glad I found this page! I am Definitely going to have to try making one for my son! He loves “blankies” so it would be perfect for him!!! Definitely thinking about making him a spongebob quilt! He would go nuts over it! 🙂
Your tutorial is the best one I have found. I’m making one for my husband out of his old flannel pants and one for my son with his old receiving blankets.
Il est superbe ce plaid
merci pour la technique
bonne journée
country
Hi Kara, I have a question. Have you ever make a quilt out of old Army uniforms? My friend would like me to make him a quilt of his old ACU (Army Combat Uniform) for his young son, I have never made a quilt but am up for the chalange. I just cant find anything on the web to give me ideas on how to begine. Any suggestions?
Thanks, Corina
My friend made a “rag” bib like the other tutorial Kara has out of my husband’s camo and it did not fray much but it is adorable! She even took one of his little canvas name tags and put it on there. It is a heavier material so I’m assuming it would be similar to working with a denim. I’m not a great seamstress myself but just from what I can tell on the bib, you could make a rag quilt like this using the same method with squares and alternating some other fabrics in there?
So I found you on Pinterest for the crepes recipe. However this is something that I really wanted to do with my older kids baby blankets. I had no idea how to even start but with this and a little imagination I am finally ready to try it. Thanks!!
Hi Kara, I dont understand how you get your rows sewn together. Can you explain more thoroughly. Thanks!
Hi Kara, I just love this rag quilt. I made a tumbling block rag quilt for my grandson and it turned out amazing, and now I have a granddaughter on the way and was looking for a new idea for her, this rag quilt is adorable and I already have the material in 4 different coordinating colours. Thanks again for the great idea,
I absolutely love this little quilt!!! Will be making one for my daughter this week!! I’m using receiving blankets to make mine. I always love the way that the colors match so well when they package them and since I have so many I thought it would be a great way for her to cherish them in the future!! I’m hoping to make several so that she can keep them for her children!! What a great idea!!! LOVE IT!! Thanks 😉
Love the idea of using receiving blankets! I’ve got a bunch I could use. Genius!
so, do I wash the flannel before sewing or leave the washing until after it’s been completed? Thanks!! This is my first rag quilt, but I’ll bet it won’t be my last!
I would definitely wash your flannel prior to any sewing 😉 I usually wash everything beforehand, just in case 🙂
I’ve made many quilts, but this one really caught my eye. I made one out of flannel for a Bunco pal’s new baby. I liked the thickness without batting. Normally I’m a huge pin-aholic, but I found when I was sewing the X that the two pieces of flannel stayed together without pins and didn’t shift. Cutting all those seams was tiresome and I had to wash it several times to get the look I wanted, but it turned out beautiful. And I love the idea that the back is already done. That is usually my least favorite part of making a quilt. I’ll definitely be making more of these in the future. Thanks for a great project!
I should add that I did use pins when I sewed the strips together. I’m not that brave! 🙂
I agree with you–cutting those seams does seem to take forever. But it sure does make for a cute quilt! 🙂
Just wanted to say …. I tried the chocolate peanut butter cookies LOVED THEM!!!!! Will now add them to my cookies must haves Thank you.
Hi Kara – I’m expecting my first great grand baby in July and want to do something special. I found your instructions and can’t wait to get started – this will be perfect! But, I’m a little confused about cutting the flannel 1/2″ smaller than the fabric squares and then sewing a 1/2″ seam. Is there a problem with making sure the flannel is “captured” when sewing the squares together? I can’t wait to give this a try! God Bless your efforts to adopt.
Hi! I would love to make this for my nephew, would should be here in about 5 1/2 weeks. My question is, are you using a sewing machine, and if so what setting? If not, how are you doing it?
I found your instructions through a Google search then I pinned this tutorial on Pinterest! You have great photos and instructions. I have all my strips sewed, but I haven’t braved sewing strips to each other–I went and bought longer quilting pins in the hope that they will help with shifting. Thanks for sharing!
Kara,
I don’t have any experience with machine-sewing through batting. I pinned my first sandwich with four pins, but when I sewed through it, all the layers ended up out of line with each other. I understand that a small amount of mis-allignment wouldn’t matter that much, but it was crooked by about 3/4 of an inch! Do you have any suggestions?
Thanks,
Vicki
Vicki, are you using the thin warm and natural batting? It doesn’t shift as bad as the thicker stuff. Either way, if it is shifting that much, use more pins. At least two per side should hold it in place. Good luck!!
Hi Kara,
I’m so happy to have found your tutorial! I’ve been curious about how to make a rag quilt ever since I saw one in a specialty shop last fall. I was surprised at how simple it is to make (excellent step-by-step instructions). I split out the work over three days and spent about 3 hours each day to make the crib-size baby quilt. I bought the fabric and cut all of the squares on Saturday, sewed on Sunday and snipped, washed and dried on Monday. My kids helped me “make the sandwiches” and sew the x’s. It was a real team effort!
I’m working on one of these right now for my daughter to take to college with her. It is denim on one side and flannel on the other. I’m not adding layer of batting, it is already heavy enough, and I’m not sewing the squares together in an X and it is turning out great. Because it is so heavy (X-long Twin), I’ll be taking it to the laundromat to wash and dry. I read somewhere that if you clip the edges at a 45 degree angle that they fray better. I think I’ll try it on some sample squares before I clip the entire quilt. I also read that you want to use 100% cotton for both front and back as polyester blends will not fray.
If you’re not using batting, then you don’t need to sew the “x”, you are right! I’ve never heard of clipping at an angle. Let me know how it works.
And yes, cotton is definitely best for good fraying results!
I love your tutorial on making the rag quilt. I have been looking at several sets of directions and love the up close pictures you have with yours. It makes it so much easier to get a good idea of what to do. Also, I am an adoptive Mother. However, my situation is a little different. My hubby and I did an adult adoption of our youngest daughter. She had been in the foster care system, was adopted at age 12, but mistreated terribly. She was one of my hubby’s ROTC students and that’s how we found her. She has been a blessing in our lives and hopefully we have been the same for her.
I made a dinasaur rag quilt from a Simplicity pattern. I used flannel but it pilled up so bad. How can I tell if the material I select will pill up or not? It really ruined it for me, although the dino turned out cute. I never gave it away 🙁
Thoughts? HELP
Thanks!
Just found your instructions on making a rag quilt. I have been wanting to make one for my granddaughter but could not find clear instructions that compare to yours. Thank you!
So glad to hear it. Thanks Cindy!!
I was wondering when making this if its possible on the back to have just solid fabric without the squares?? how would I do that? any ideas….
For this method you sew the back and front together before piecing it together, so you can’t have a solid piece of fabric on the back. You can do stripes instead of squares though, I’ve see a few of those online.
I’m curious as to about how long this took to make? I’m thinking of making a twin-size, so I know it will take longer, but just trying to get an idea. (anyone who has made one can feel free to “weigh in”. I would consider myself to have amateur sewing skills, but I can thread the sewing machine 🙂 and sew stitches good enough for me! I think that once you get going, this is a fairly simple process….thoughts??? Should I even begin to attempt this (I am 7 months pregnant and work part-time…) am I crazy to think I could get this done and done half-way decently???
I made one of these in about 3 days. I probably would have had it done in 2 but I have a baby and the third day was mainly just cutting and washing/drying 🙂 Hope that helps!
Haha! Kids really do have a way of making craft projects last longer, don’t they? Three days is still really quick for a quilt though; that’s why I love this method so much!
Yes, you should be able to get it finished. Another reader said it took her three days. Obviously a twin size will take longer, but you should still be able to get one done fairly quickly. Good luck!
I made a queen size with the university colors/prints for my daughter for a graduation gift when she went back to college and got her MBA while working full time and a divorced mother of two children. It ended up costing quite a bit and taking a couple of weeks, but I was so proud of her accomplishment it didn’t matter! She loves it and takes it to football games at her alma mater with her kids & it is big enough for all 3 of them to snuggle under and at the same time supporting her team spirit! I love your baby design and just bought fabric to make one for a grandchild expected soon. Will send you pictures of both when the baby quilt is done! Thanks for the inspiration!!
I love this!! I have seen several tutorials on this, but yours is the best one I have seen. I have both a 14 yr old girl and 8 yr old boy. This would not only be a great idea for a baby, but also a loving quilt for my kiddos’. What would you say would be a good yardage for a twin and full size bed. Yes, more time, but more love too.
-Thanks
Thanks so much Aimee! Sewing I can do. Figuring out anything math related? Not so much. I usually just go to the fabric store and have the ladies there help me figure out how much I need. They are way better at it than I am! 🙂
Kara
Kara,
Awesome tutorial! Thank you!
I have a question…wanted to make one of these for a male and used denim mixed with some masculine cotton prints…do u think they will work ok together, or do the fabrics have to be similar weight? of course the denim is heavy and the cotton isn’t….he’d rather have the ‘heavy’ feel of a blanket than the softness…just wondering how to do it best.
I will be praying for your baby to find you soon 🙂
Thanks for such an easy tutorial!
Hi Kerri,
If you want to make a quilt with denim and cotton I would make sure that you have at least one layer of denim on every square. If you make it cotton on one side and denim on the other you can design it so that one side is all denim or make designs with the cotton and denim. If you do every square denim on one side and cotton on the other it will be an even weight all over. I wouldn’t recommend using any blocks that are cotton on both sides because it will throw the weight of the quilt off.
Hi Kara!
Thank you for the lovely tutorial. I just finished cutting fabric for a Green Bay Packers quilt for my mother and father in law, and you taking me through it step by step has helped SO much!
I have been told that it is generally a good idea to take your rag quilt to the laundromat so you don’t ruin your washing machine or gum up the works in your plumbing, so I think I won’t even risk washing in my own washer!
I will definitely post pictures when I’m done 🙂
Kara thank you SO very much for this tutorial. My husband’s grandmother has always made quilts for other people….and the other day I’d asked her if she knew how to make one of these….she tells me “Oh sure, you just cut up the scraps or clothes you like and make a pattern and sew them together!”…she thought I meant literal rags! So I’m pretty sure I’ll be making one of these for her for a Christmas gift…after all, what do you make for the woman who can make anything? Something she doesn’t know how to make of course! Thank you so much again!
Haha, that is so funny! I’m sure the “rag” quilt you make for her will be much cuter than the kind she was thinking of. LOL!
LOL! I did overbuy at a black friday sale today, I want to make larger (twin size-ish) for my three grown sons for christmas. Then they can use them whenever… my question is this, I bought several solid colors of flannel, the reds and blues and dark browns have me worried…should I wash them first?? I’m worried about the colors running, or can I just add vinegar to the water when I wash the first time??
Also, I want to use a layer of flannel instead of batting, do I still have to pre-quilt/tack it if I cut them all the same size and the middle layer will be sewn and be part of the fluffiness? I’m thinking of using 10″ squares…
Thanks for your help and great tutorial!
Dee
I almost always wash my fabric ahead of time with any sewing project. It helps prevent colors bleeding, and drying the fabric in the dryer ahead of time prevents weird shrinkage in the final project.
If it were me, I’d still sew the three pieces of fabric together with an “x”. It will make it much easier to sew them together, especially since you are using larger squares. It’s always frustrating when I’m trying to sew through multiple layers and they slip around. But of course, it is totally up to you. 😉
Kara
My hubby and I are expecting our suprise blessing #3 in Feb. and we are finally moving our 5 year old out of her toddler bed (She is VERY tiny for her age). She wanted to make her own “big girl bed” blanket… I am going to help her make this! I am so excited about it- she is too! We are hitting Hancock Fabrics today for their great black Friday sale. 🙂 I am so glad I found your tutorial- it has been a while since I made one and I was struggling with fabric amounts. I was about to WAY overbuy fabric!
This tutorial is awesome! I have just recently started sewing/quilting and have wanted to do a rag quilt. The books I have are a bit confusing, so I was really happy to google your site. I made a Christmas rag quilted wall hanging, and I have to say it turned out pretty nice!
Your instructions are amazingly helpful!! Thanks so much!
This tutorial was amazing! Got me through my first quilt 🙂 Thank you so much!!! I am so grateful for the detailed instructions. I linked back to you in my post about it twice!
Priscila @ jensennp.blogspot.com
Two questions please…….Is it necessary to back tack on the cross stitching of each block? A note from and earlier experience…I made a rag denim (no stretch jean fabric) and flannel quilt some time ago. My dryer handled the lint but my washing machine did not….cost $100.00 for repair man to come out and clean out pump/filter!!! Any ideas how to prevent this problem?
Hi Sylvia,
It’s probably not necessary to back tack on the “x’s” but I like to do it just to be safe.
I’ve never heard of a rag quilt damaging a washing machine before. How awful! I wonder if it was just because the denim is so heavy? I know a few people have told me that they use a comb to “rag” the edges of their quilts. Maybe that would help remove some of the lint ahead of time. Good luck!
Kara
Thanks so much for your step by step directions, it was my first ever quilt and it turned out AWESOME!!!!
i am having a hard time figuring how much of each material to get.
I’m using 5 inch squares. 72 sqs total. (9×8) 4 diff fabrics
10 squares of fabric 1
26 sq fabric 2
22 sq fabric 3
14 sq fabric 4
can you help me with this?
Oh sheesh. Math is my very worst subject! I am so bad at figuring things out I usually just buy extra of everything so I know I’ll have enough. LOL!
To be honest, I sometimes ask the ladies at the fabric store to help me figure out how much I need. They are much better at it than I am. Sorry I’m not much help to you.
My friend has made a few of these for babies and she doesn’t bother to put the batting inside — just the 2 layers of flannel. Maybe because we live in a warm climate!
I’m getting ready to make one myself for a baby due in Feb.
Having a hard time finding the snubbed nose spring loaded scissors my friend has 🙁
Does she still do the x’s as though the batting were there?
How much of each color did you buy?
I am having a lot of problems with the flannel shifting when I sew the X on it so then it ends up looking uneven. I love this idea. Any advice you could give would be welcome. I really want to make for my pregnant sister but I’m worried it is gonna turn out sloppy looking.
I just had a granddaughter born on August 14, and by August 19 i had a finished rag quilt thanks to your tutorial! I didn’t have a single question! Worked perfectly! Thanks! This won’t be my last!
If I wanted the entire back of the quilt to be one big piece of Minky, what would I need to do differently?
Very well done tutorial and a beautiful resulting quilt. I especially like your tip about cutting 1 inch squares to get your design layout. I can’t wait to try this myself. 🙂
i just stumbled onto this tonight. i was looking for a new baby blanket to make and this looks awesome and wait to try it!
I love your tutorial. I am new to all this quilting stuff but your directions are quite clear – can’t wait to try it.
I have looked at so many tutorials on rag quilts, and so far yours has been the easiest one to understand. I am looking forward to making my first rag quilt for a sweet friend of mine who is having a baby this summer. Thanks for posting this tutorial!
Hello! I also love this site of yours. Looking for a rag quilt pattern, and how to’s is not an easy task. You did a great job with this tho! My question to you is this: If I want to use 5 different types of fabric, using the same fabric for front and back, how much of each fabric do you think I need if Im doing 8 inch squares and wanna do like 5 squares by 8 sqaures? This is my first quilt so I am all new to this. THANKS 🙂
I found your tutorial while reading someone else’s blog. It’s fantastic. I can’t wait to try it out. I do have one question. How do you think fleece would work? Thanks again!
Thanks for this great tutorial! This is one with pictures all the way through and I really appreciate it!
My question is this: I want to make a double sided rag quilt, with pattern on front and back. Do you think that I should split my seams so they are front and back, or will that make them not frilly/frayed enough? I could do one side without frays like your sample, but I want it to be clear that it was meant to be like that, and that I wasn’t just being sloppy and didn’t want to finish my ends on one side.
Thoughts?
I also am trying to find easy directions to do this. Instead of doing one layer in the middle, I want to do two at the same size of the top/bottom so there will be 4 pieces of fabric. Is there an easy way to make a two sided rag without having to make one top layer of two and one bottom layer of two and quilting them together afterwards?
Anywebsites that show ideas?
I am going to start cutting my fabric Monday and I will def let you know how it comes out. Thanks for replying back to me!
I was just wondering if you had to do the “x” mark in the middle or if you could do a circle or something besides an “x”?
Thanks, Sheila!
I think a circle would work as long as it was pretty large. You just want to make sure the pieces of fabric are attached well enough that they can’t slide around. Let me know if you try it, I’d love to see the result!
I love this! What a great batting-stash-buster quilt.
Thanks for sharing!
This is beautiful! Thank you so much for posting! I have never made a quilt before, and am having a son in June. I just got a really great deal on some Debbie Mumm fabric at Jo-Ann’s, without any plans what to do with it. Just couldn’t pass up the deal. It’s gonna make a GREAT rag quilt! Can’t wait to get started. Your instructions are very clear, thanks again!
Thanks Katie! I’d love to see your quilt when you finish! 🙂
Thanks for the great instructions! The photos really help allot. I have a new grandbaby coming soon so this tutorial is perfect for me! Ill keep my fingers crossed for you and your new baby.
Thank You Again
Fran
Thanks Fran!!
I love thus idea. I work at a daycare and one of my mom’s made this following your instructions! So I am going to try my hand at it. Wish me luck! Ps. I hope you get your child! My husband and I have two children and always wanted three but I have terrible pregnancies and the doctors told me both times that I should not get pregnant again because I will surely die. We decided that we were not going to press our luck again. but we have decided to look into being foster parents and if God gives us the oppertunity to keep one of those children than that’s what we’ll do. Good luck and I’ll be praying for you!
Glad to hear you will be trying the quilt. Feel free to ask me any questions if you need help! And good luck with foster care. Hopefully both of us end up with the children that are meant to be in our families. 🙂
I was wondering how well it worked hand sewing your blanket??
It’s not hand-sewed, I used my sewing machine. Much faster that way!
Hi Kara,
I love your blog – I’m going to stalk you, for sure. I discovered it while searching for a tutorial on rag quilts. Yours is the clearest, most easily understandable I have found. You did a great job explaining each step for us quilting newbies, and your pictures are top notch.
I do have a question for you. I’m at the clipping stage and I am a little confused about the best way to clip the corners so I don’t end up taking a chunk out of the fabric and making the finished quilt look a bit wonky in the process. Do you have any pointers for me?
Any help you can give me would be SO appreciated!
Thanks,
Mary
Hey I left a comment about a month ago saying THANK YOU for this AWESOME tutorial! Here’s what I made:
http:.pinkpineappleprojects.com/2011/01/rag-quilt-christmas-stocking.html
I wanna see! 🙂 I tried to look and it said I had to be invited
I’d like to see it too. Thanks.
I have had fabric for a rag quilt for over ten years but it has sat in the drawer because I never really understood how to make it. Now I understand- thanks to your tutorial!
I am so glad to hear that Patti! I’d love to see it when you get it finished. 🙂
I meant to spell WASH. Should I wash the fabric first. SORRY.
I helped my cousin make a rag quilt with flannel on the front and minky on the back. We washed the flannel first, but not the minky, because it doesn’t shrink.
I don’t recommend using minky on both sides. It doesn’t fray, so the seams just end up looking sloppy. Flannel works much better for a rag quilt! 🙂
Kara, thank you for sharing this “step by step” tutorial! I am new to quilting and this is the very BEST rag quilt tutorial I have seen after about twenty in one night. I wonder, if I use minky should I was the fabric first and after? What if I mix it with cotton or flannel? Should I was them both first?
Thanks again 🙂
LOOOOOOOOOOOOOOOOOVE it!!!!!
Thanks for sharing!
new folloer..
love this..can’t wait to try it
🙂
also can u use any fabric?
Thanks you so much for this tutorial! It was super easy to follow and every step was covered. Perfect for beginner seamstresses like me! I have my project all sewn and ready to cut the edges; I can’t wait to see what it looks like all finished and washed! Seriously, thank you! I am pretty new to sewing, and your thorough yet simple tutorial gave me the confidence to try a rag project. Now that I’ve done it and it was easy and it turned out well I’m even more confident to try new things! I’ll definitely be doing more rag stuff in the future 🙂
Thanks so much for the tutorial, l stumbled on your site while looking for sizes to make my grandbaby one for xmas this year. I absolutely love the colors you used, browns and pink are 2 of my favorite. I’ll let you know how mine turns out, l’m using a rich purple and soft yellow plus some white pattern flannel.
Thank you for your blog. I went out and bought way too much fabric yesterday before reading the total amount you used! I am making two blankets for a friend’s twins (hopefully the blankets will turn out) and I hope to update you when they’re finished. Terrific site, I hope that all is going well with your adoption processes. It is a long haul, I have friends on a waiting list for an adoption.
Praying that God blesses your home and family!
Thanks LoraLu! And good luck with your blankets, I’d love to see them when you finish. 🙂
Thanks a million for sharing this! I absolutely love it. I’m new to sewing on a machine. I am definitely going to attempt to make one for my niece whom practically lives with me. I’m really happy I found your blog. Thanks again!!
I’m glad you found me. 🙂
You’ll have to let me know how your blanket turns out.
Kara
Anyone ever make one of these for a big people? Would it OD my washer and dryer with lint? I love this! I envision making a jacket like this too… my mind is going on and on with the possibilities.
Glad you shared, glad I found you! Thanks!
Lynda
You can totally make one in a larger size. Just empty the dryer lint screen a couple times while drying it for the first time.
I have made an adult rag quilt out of my daughters old cheer tshirts…turned out great and just used a flannel sheet in the middle for the batting. I cant believe how heavy and warm it is.
Rag quilts for adults are commonly made with denim on one side and flannel on the other–no batting needed! The denim frays beautifully and makes a warm, heavy, hard-wearing quilt good for watching tv or taking to the ballgame. Use new denim, or recycle the good parts of old jeans.
I bought the pattern for this quilt, and it has an adult sizing on it. They make every second square up of 4 tiny squares, and it is all done in plaids…. really beautiful! They also use larger sewing allowances. They use a ‘walking foot’ on their sewing machine, which makes it easier to feed the fabric through. I have made quite afew, often with random placing of the squares, they are all unique, and beautiful in their own way. I made a totally blue one for my first grandson, tones of blues, anything goes, really.
I made a couple of double bed sized rag quilts and they are warmest blankets I’ve ever had except for a very large down comforter that I bought in Austria 40 years ago! I do NOT pre-wash the flannel as when it shrinks the stitches lock. You do have to be careful when washing it. The first 3 or 4 times, you need to check the dryer half way through the time and clean the filter. If your washer doesn’t have a heavy duty setting you might want to take it to a laundromat. Good luck!
I have made two of these in a twin size. One using 6″ squares, the other with 12″. They both came out great!
My quilt was a hit at my sisters shower and I have orders for more. I’m having a hard time figuring out pricing…any ideas how to figure pricing??
That is always the hardest part for me. Usually I check sites like Etsy to see what others are charging just to get a ballpark. It also depends on the material you are using, some fabric is much more expensive than others. Rag quilts take a lot of time, so you want to make sure and charge enough to make it worth your time. Good luck!! 🙂
I just wanted to let you know that I used your idea on my blog. Thank you for the tutorial – http://spartasavings.blogspot.com/2010/08/baby-nesting-project-3-rag-baby-quilt.html.
Thanks for sharing the link Dori! Your daughter’s quilt turned out adorable!
Hi Kara! I made your rag quilt, just wanted to share 🙂 dahlialane.blogspot.com/2010/08/happy-1st-birthday-kayleigh.html
That is awesome Danielle! I checked it out and it turned out adorable. Love the pattern you came up with! Thanks for sharing. 🙂
How many yards of fabric do you recommend and which kind? Any thoughts about using minky?
I recommend starting with at least 1 1/4 yards of fabric for both sides, so a total of 2 1/2 yards. Flannel works the best. You can use minky for the back, but it doesn’t fray very well. You’ll have to wash it a few times before it stops shedding along the seams. Hope that helps. 😉
I finished my rag quilt this past weekend! Yay for me! It turned out pretty great, if I must say. But maybe it’s where I used cotton instead of flannel, it’s a little stiff feeling…? Should I wash it more, already washed it twice…?
The cotton probably does make it a little more stiff. I bet it will get softer with each washing though.
I’m making one of these quilts now with cotton. I’ll let you know how it turns out. I’m new to sewing but thought this would be fun. My sister is having the first baby of our family so I wanted to make something special for him. I’m so glad my friend showed this to me. I love all your ideas!
Another way to “fluff” the seams, is to take a comb and go against the grain with it before you wash it. It catches a lot of the little threads and gives it that “raggy” look very quickly. This method works with cotton and flannel; and saves your lint trap in the dryer. 🙂
Fun! One thing I’ve seen from being the sewing education field for years is putting a third fabric layer hidden inside, so it will only show in the seams – adds some fun color and surprise.
*smiles*
I’ve been googling instructions for rag quilts and found this post that way. I was so interested to see that you are trying to adopt. I’m the adoptive mother of two (both domestically through LDSFS) and we are in the process of getting approved to adopt a little boy from Korea. I haven’t read your whole blog, so I don’t know what is new with your adoption situation since this post was written. But I did want to share some words that I read from a birthmother recently. She reminded mom like you and me to remember that we are not waiting for a child. We are waiting for OUR child. Through the experiences I had surrounding our first two adoptions, I KNOW those words are true. And they give me hope when I need to be reminded now and then. Good luck!
Oh, and by the way, I’ve looked at a lot of rag quilt tutorials, and yours is definitely my favorite. I emailed the link to my sister, who wants to make one for her daughter. Have you ever made a rag quilt with a fabric other than flannel? I think I may have more fabrics to choose from if I do cotton, but I’m not sure how well it will fray. I’d love any advice you might have.
Becca
Thanks so much Becca, I always love getting comments from other mom’s who have adopted. It is so comforting and gives me hope. 🙂
I haven’t done a rag quilt with anything other than flannel, but I have a friend who did flannel on one side, cotton on the other. It didn’t fray as much, but it is still totally cute!
Hi Becca, I love your quilt! Is this pink rag quilt on one side and one piece of fabric on the other side? I’m a grandmother and just this year I’m making blankets for our grandchildren. I love sewing! I hope that makes since. Barb from Michigan <3
Thank you for the clear instructions ….. in the process of making one now for my new grand baby in pink of course hope it works out well fingers crossed.
Kim
Becca, I love this pattern, but would like to make one for my older grandchildren, say twin bed size. Can you advise size of squares and amount of fabric please. Thank you. I have sewn for years and enjoy making children’s clothing but now would like to try my hand at some easy quilting. Cathy.